This page gives a new user a quick start guide to the Standalone Orchidea App, and an Overview with step-by-step instructions.
Quick Start
Step 1: Open Orchidea
- Click the Settings icon on the bottom left. Add the necessary database and files.
Step 2: Create a New Project
- Select New Project. Choose the instruments you want to include in your orchestration.
Step 3: Score and Import Your Target Sound
- The Score View opens. Drag and drop an audio file onto the score. This file will serve as the Target for your orchestration.
Step 4: Orchestrate
- Click the shadowed area in the score below the Target audio file to select it to orchestrate. Click the Orchidea icon to begin the orchestration process. This will generate a chord or Static Orchestration. Press play and enjoy your orchestration!
- To learn more about options and filters for your orchestrations, or about Dynamic Orchestration follow the next tutorial (coming soon).
For more detailed instructions, refer to the more detailed guide below.
Step-by-Step Overview
Step 1 – Opening Orchidea and Database
Step 1a: Opening the App
Launch Orchidea: Open the Orchidea Standalone App.
- Note: On the first launch, you might see a Database Path Error message instead of the Welcome Screen. This is normal for the initial setup. After connecting the databases, the Welcome Screen will appear on subsequent launches.
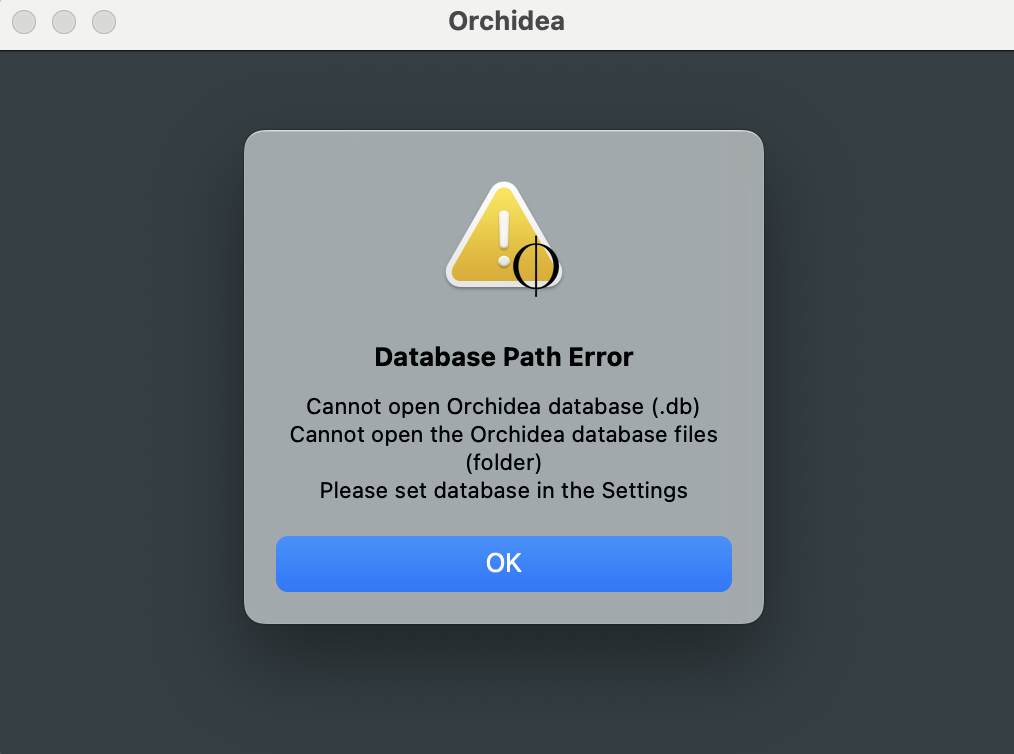
Database Error Message
- Click on the error message, and the Welcome Screen will open.
- Once we connect the databases, the Welcome Screen will welcome you every other time you open the software.
Welcome Screen Overview:
- Top Left Icon: Create New Project
- Top Right Icon: Open Project from File
- Bottom Icon: Open Recent
- Sidebar Icons (top to bottom): Play, Return to Start, Loop, Orchestrate, Inspector, Add/Remove/Reorder Instruments, Mixer, Settings
HoverLike you’re doing here over each icon and a tooltip text boxThis is a Tooltip text box! will identify it. Click on the images below and they will open in modal lightbox. Click outside the lightbox to close it.
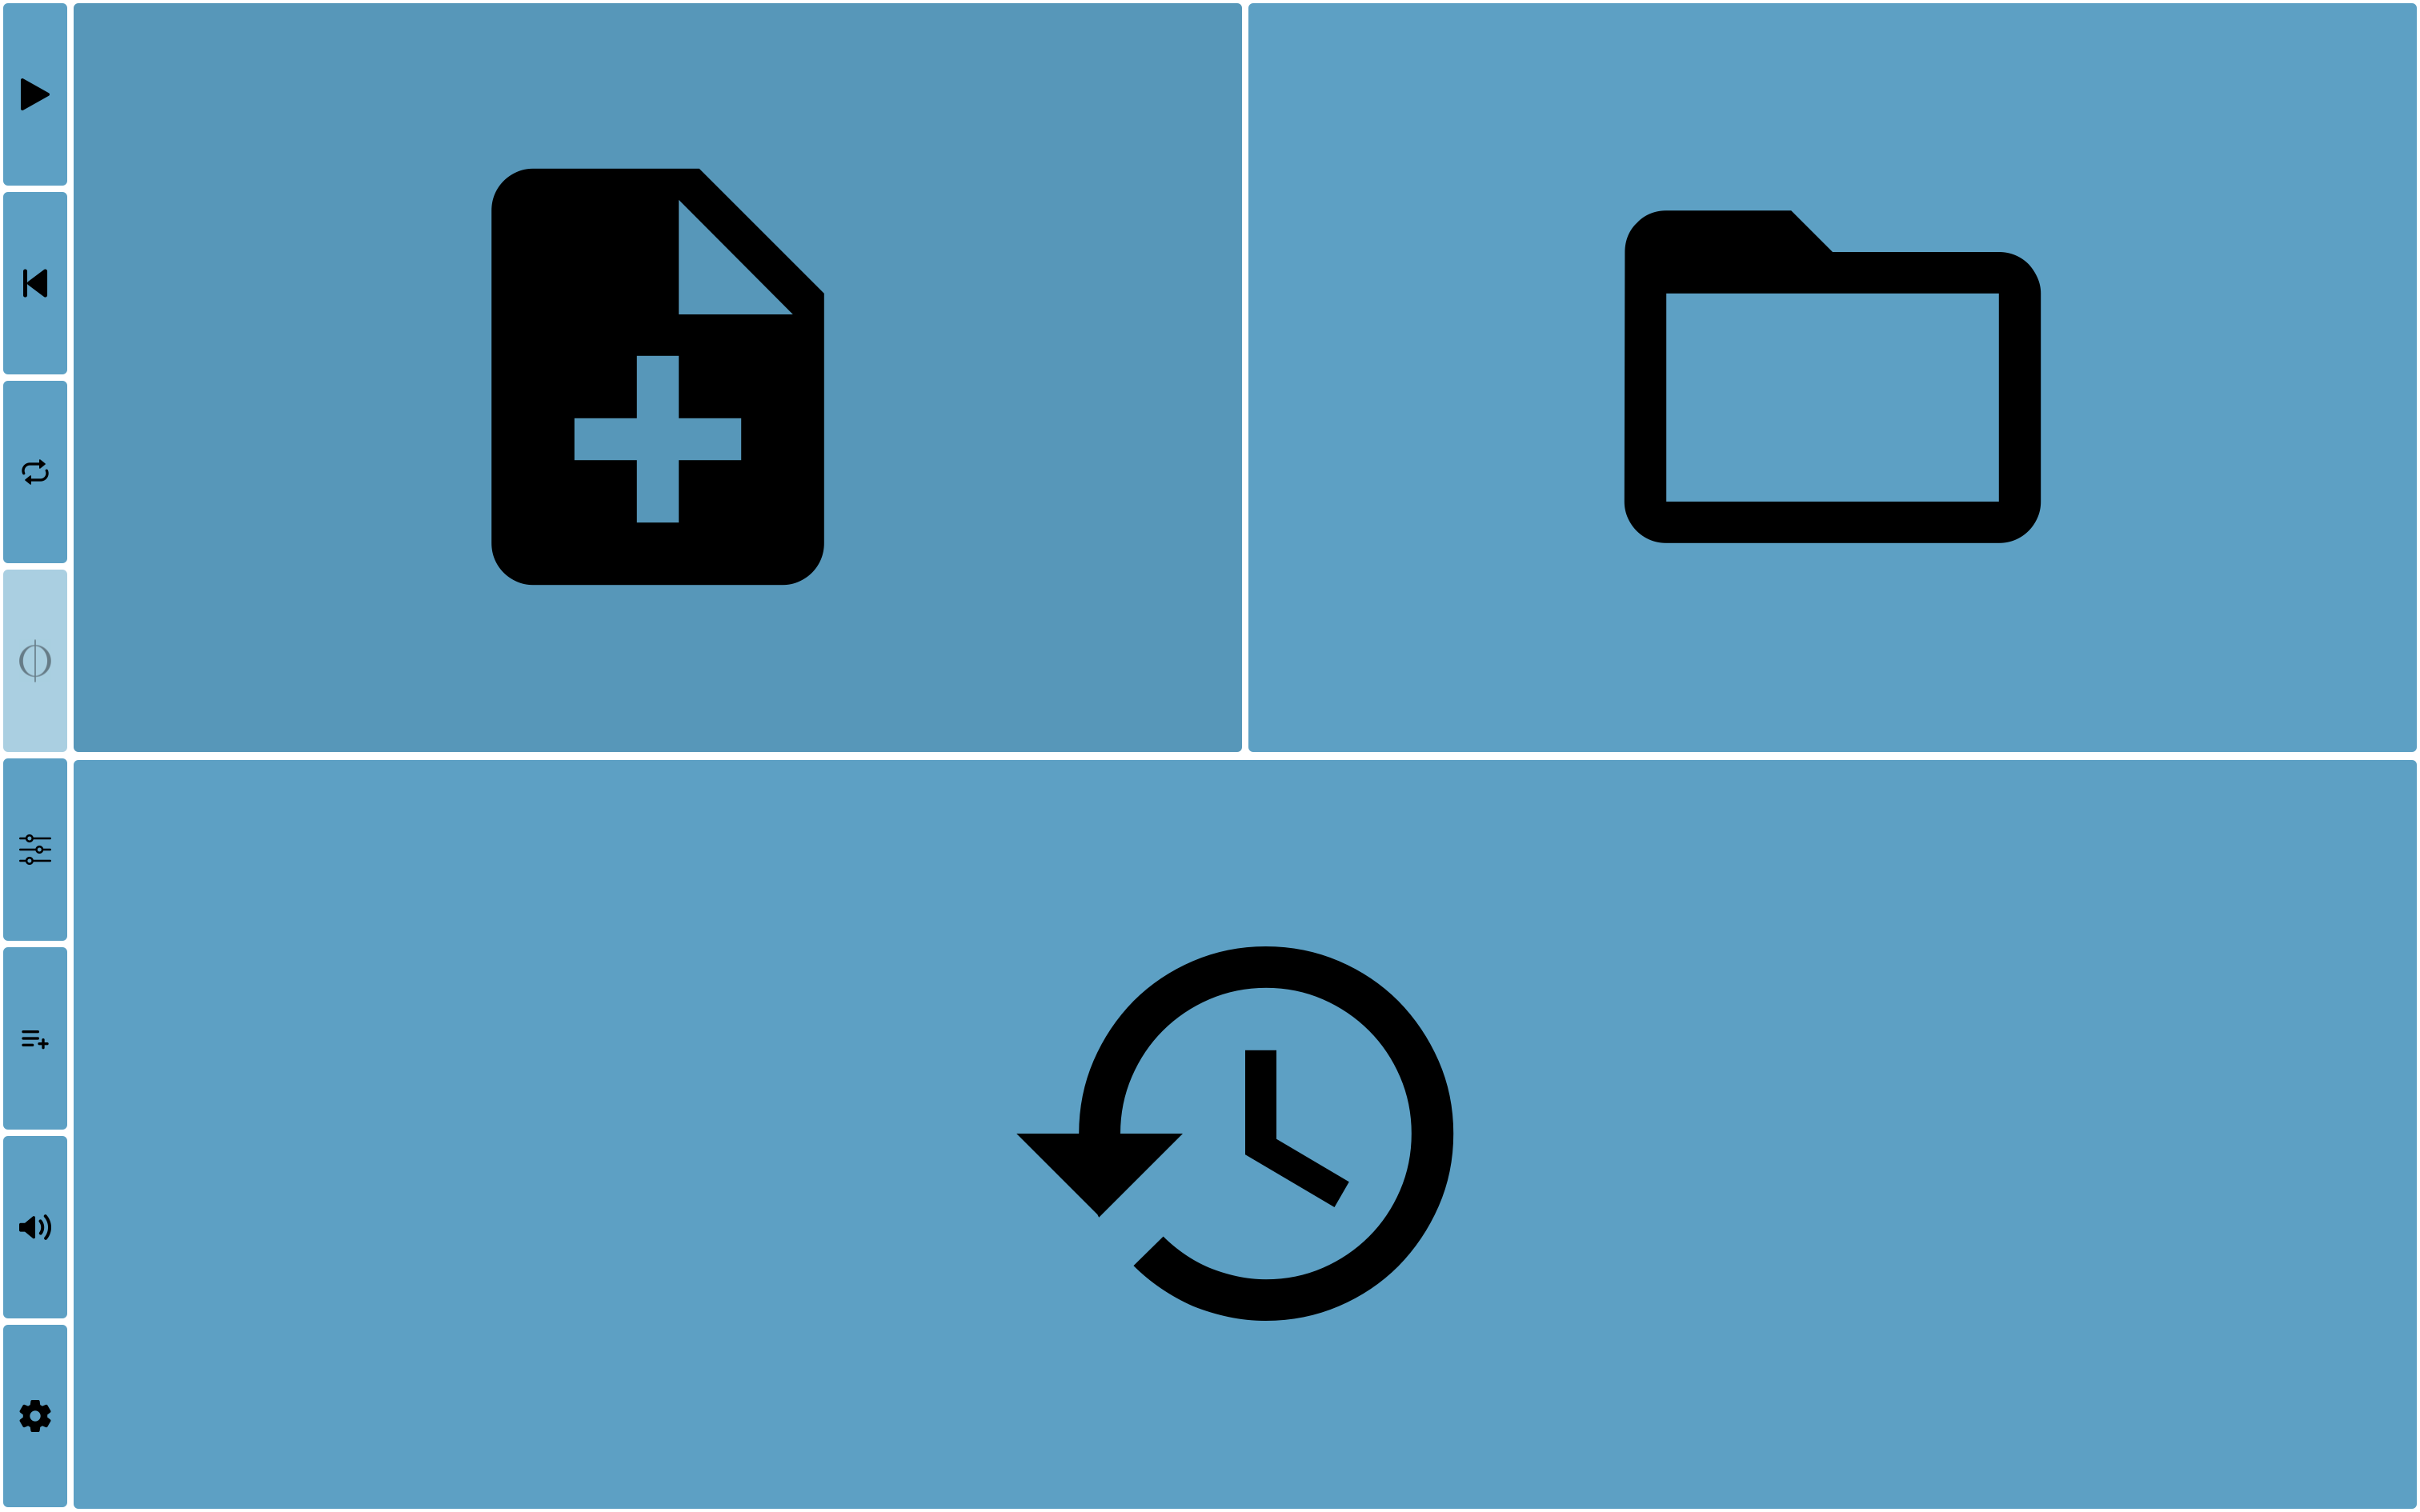
Welcome screen for Orchidea
Step 1b: Open Settings
Click on the Settings icon located in the bottom left corner. This will open the Settings window.
Settings icon
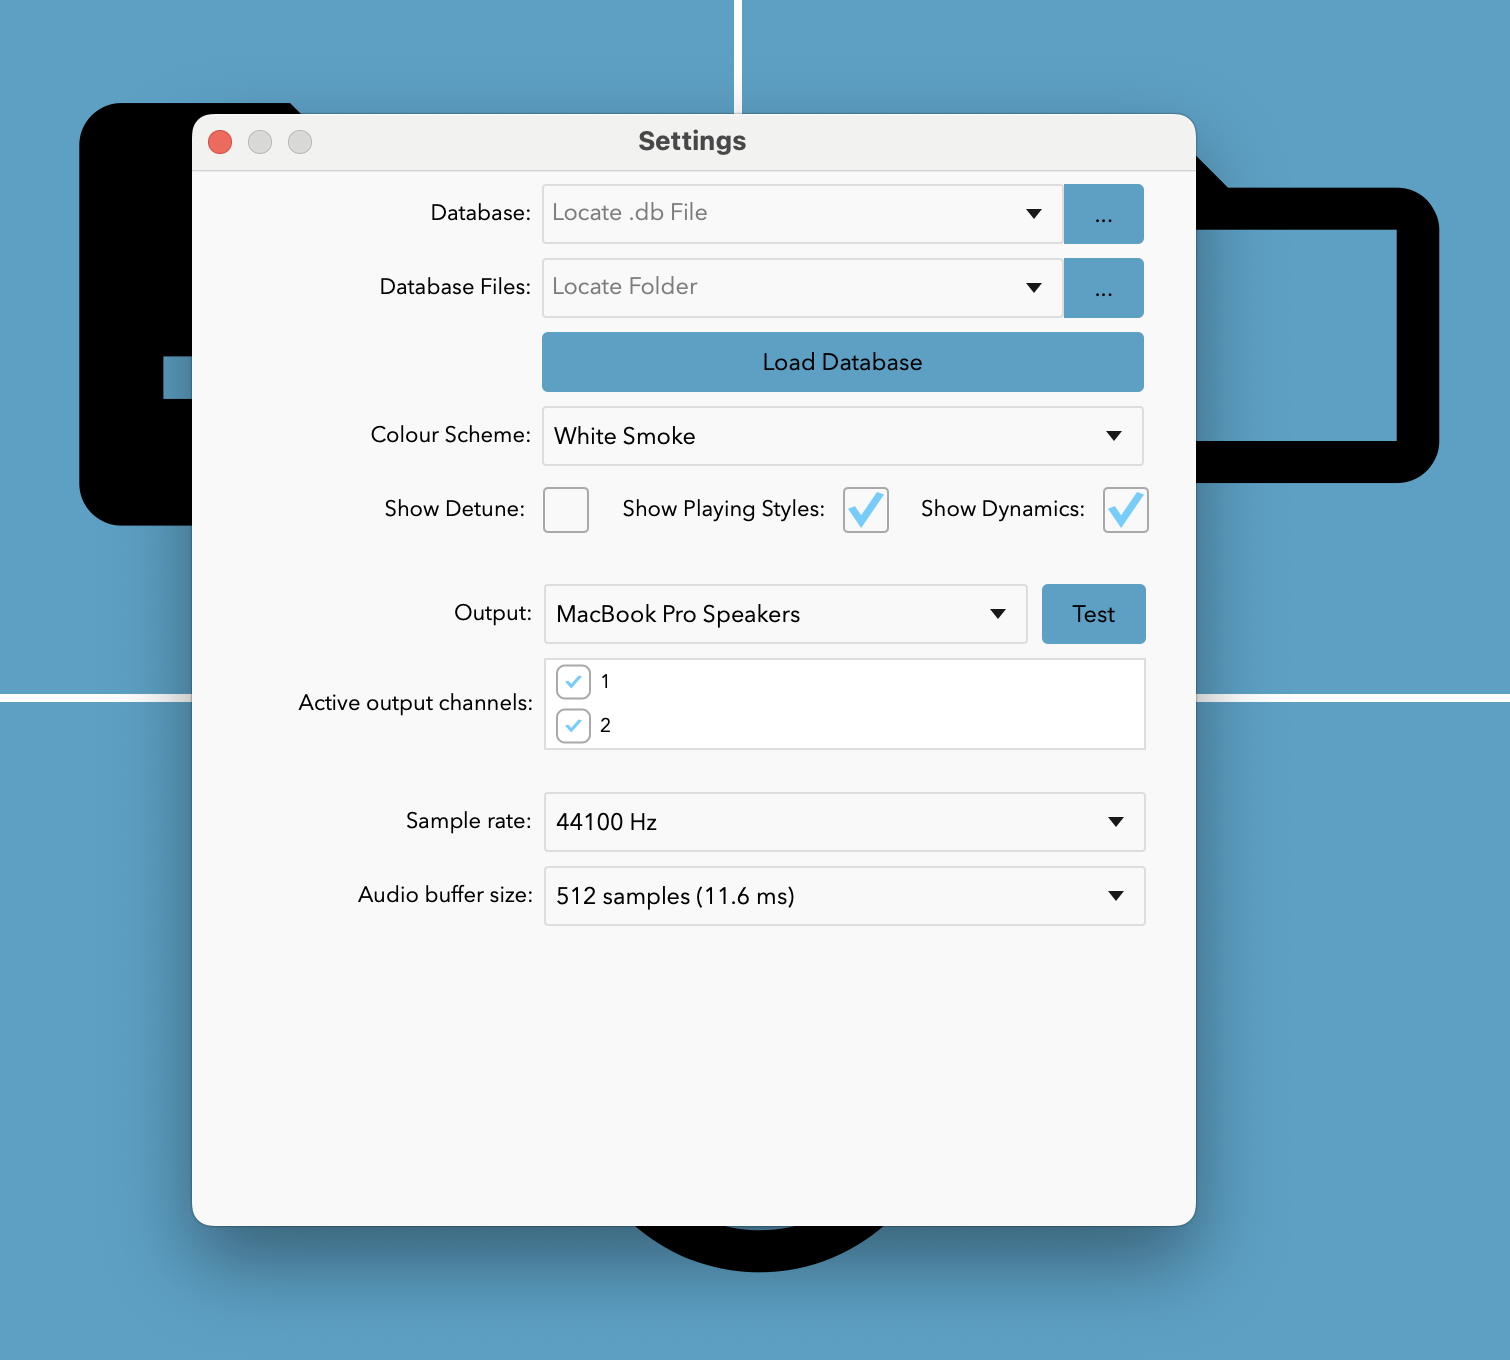
Settings window
Step 1c: Adding Databases
- Load Database: In the Settings window:
- Database Field: Add the main Databasethe file ending with .db.
- Database Files Feild: Add the corresponding Database Filesthe folder with all the audio files.
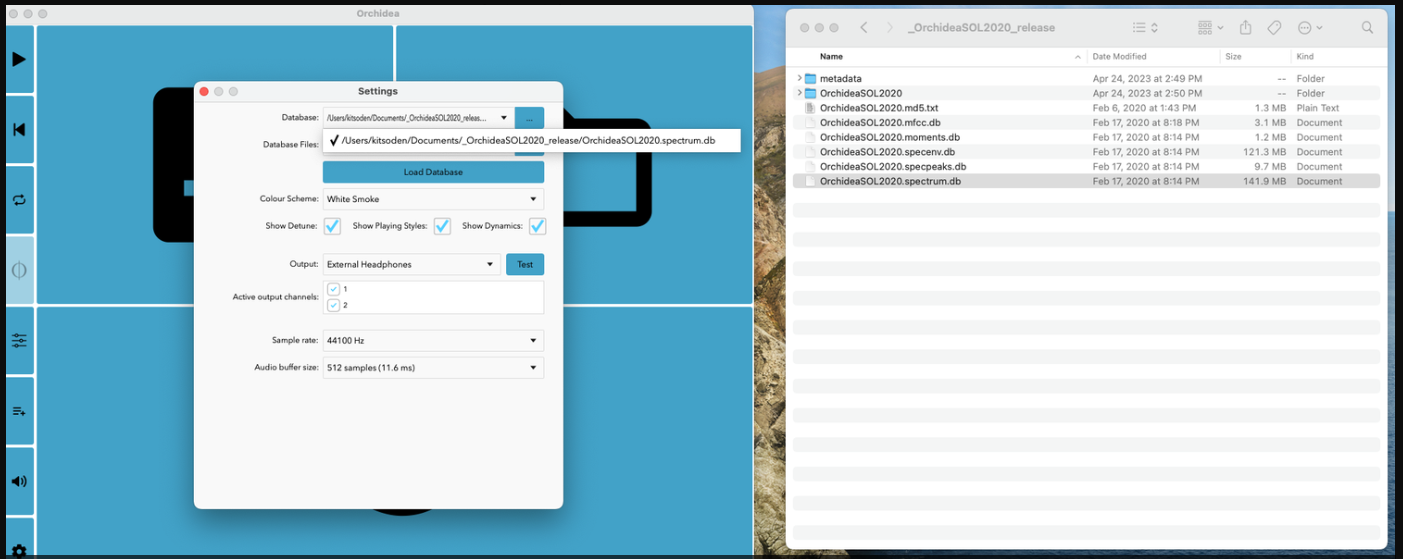
Database loaded into field, and Finder location shown
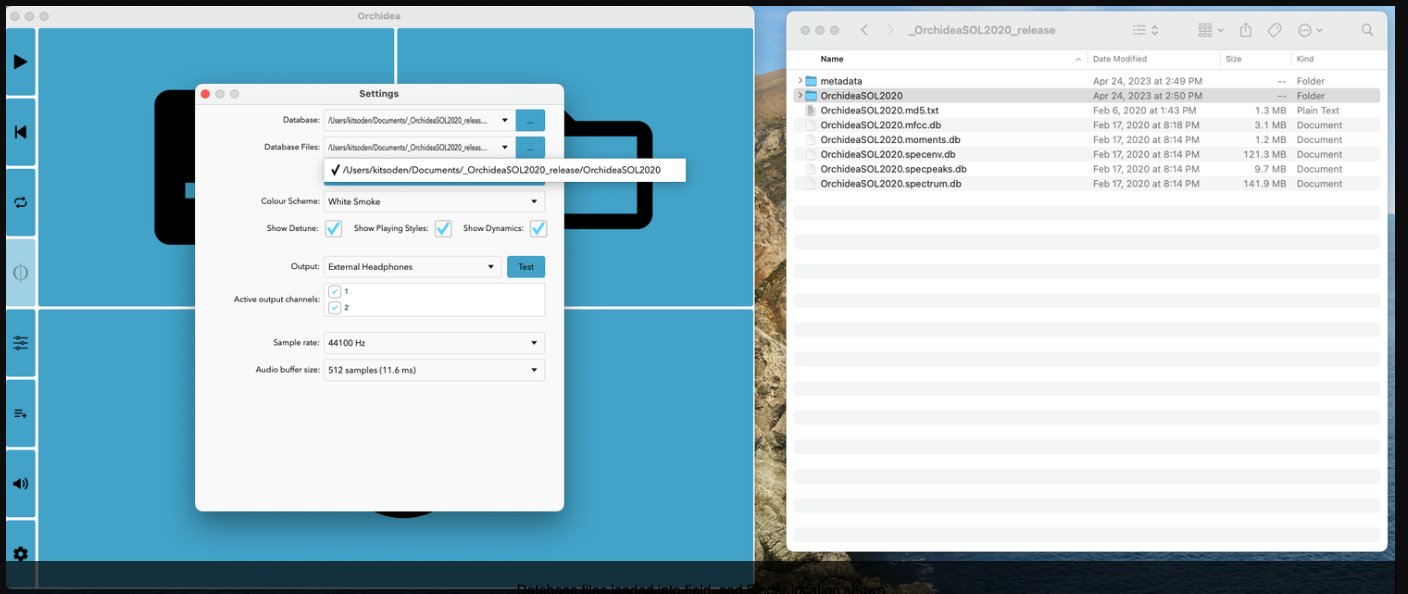
Database files loaded into field, and Finder location shown
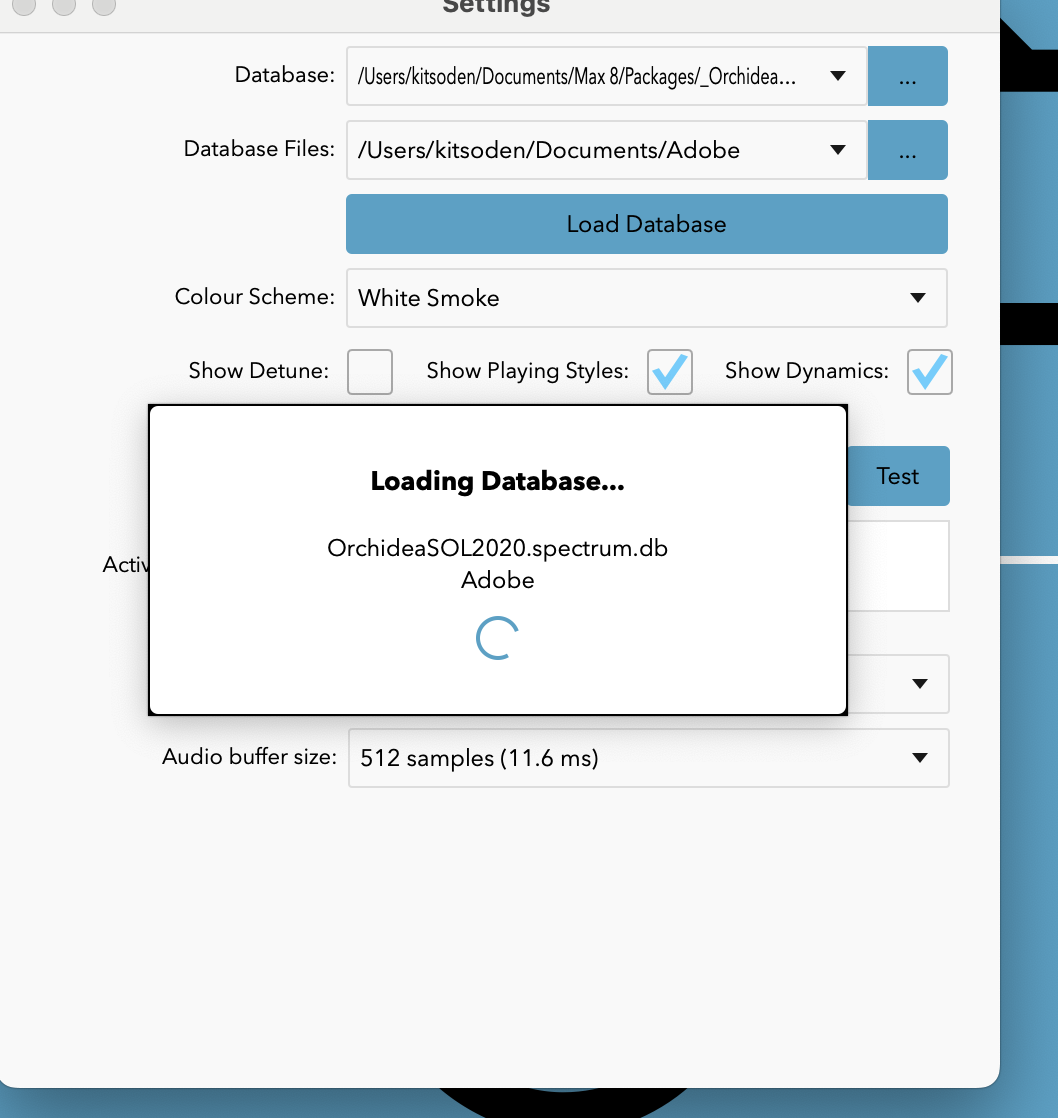
Loading Databases
- Default Settings: The default settings should suffice for most users. However,
Click detailed explanations are available if needed.
Step 1d: Close Settings
After loading the database, close the Settings window.
Step 2 – Create a New Project and Select Instruments
Step 2a: Create a New Project
- Click on the top left large icon, with the tooltip label “Create New Project.”
New Project icon
- A welcome text will appear, explaining that you can change instruments and their order at any time.
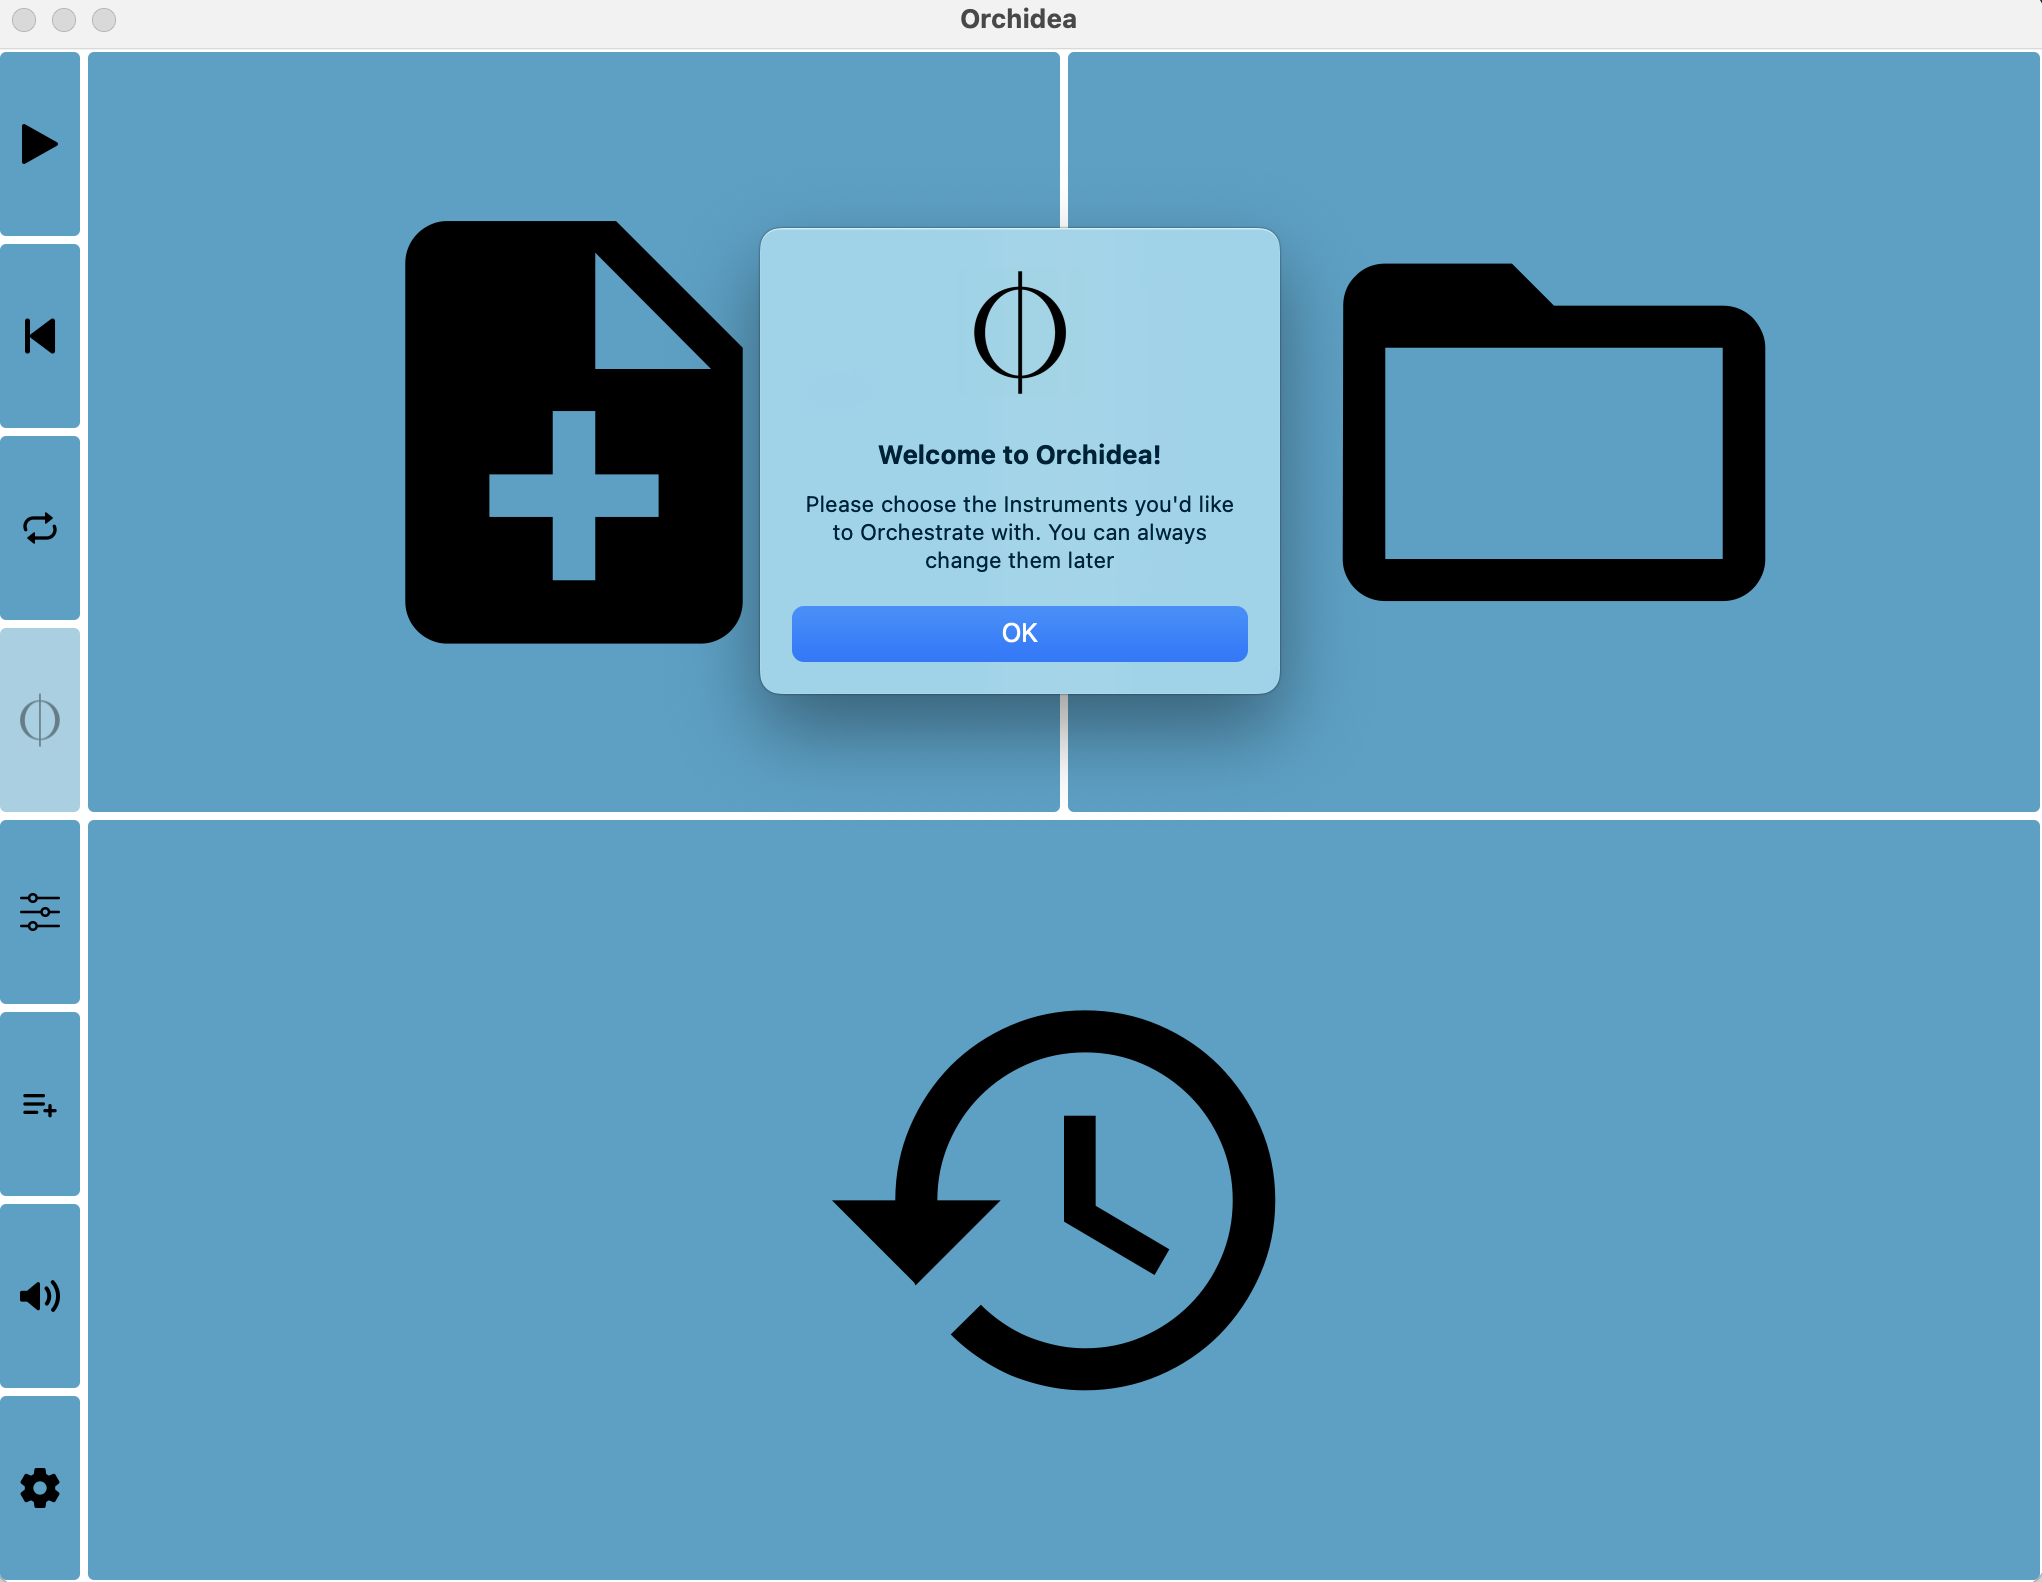
Welcome to Orchidea!
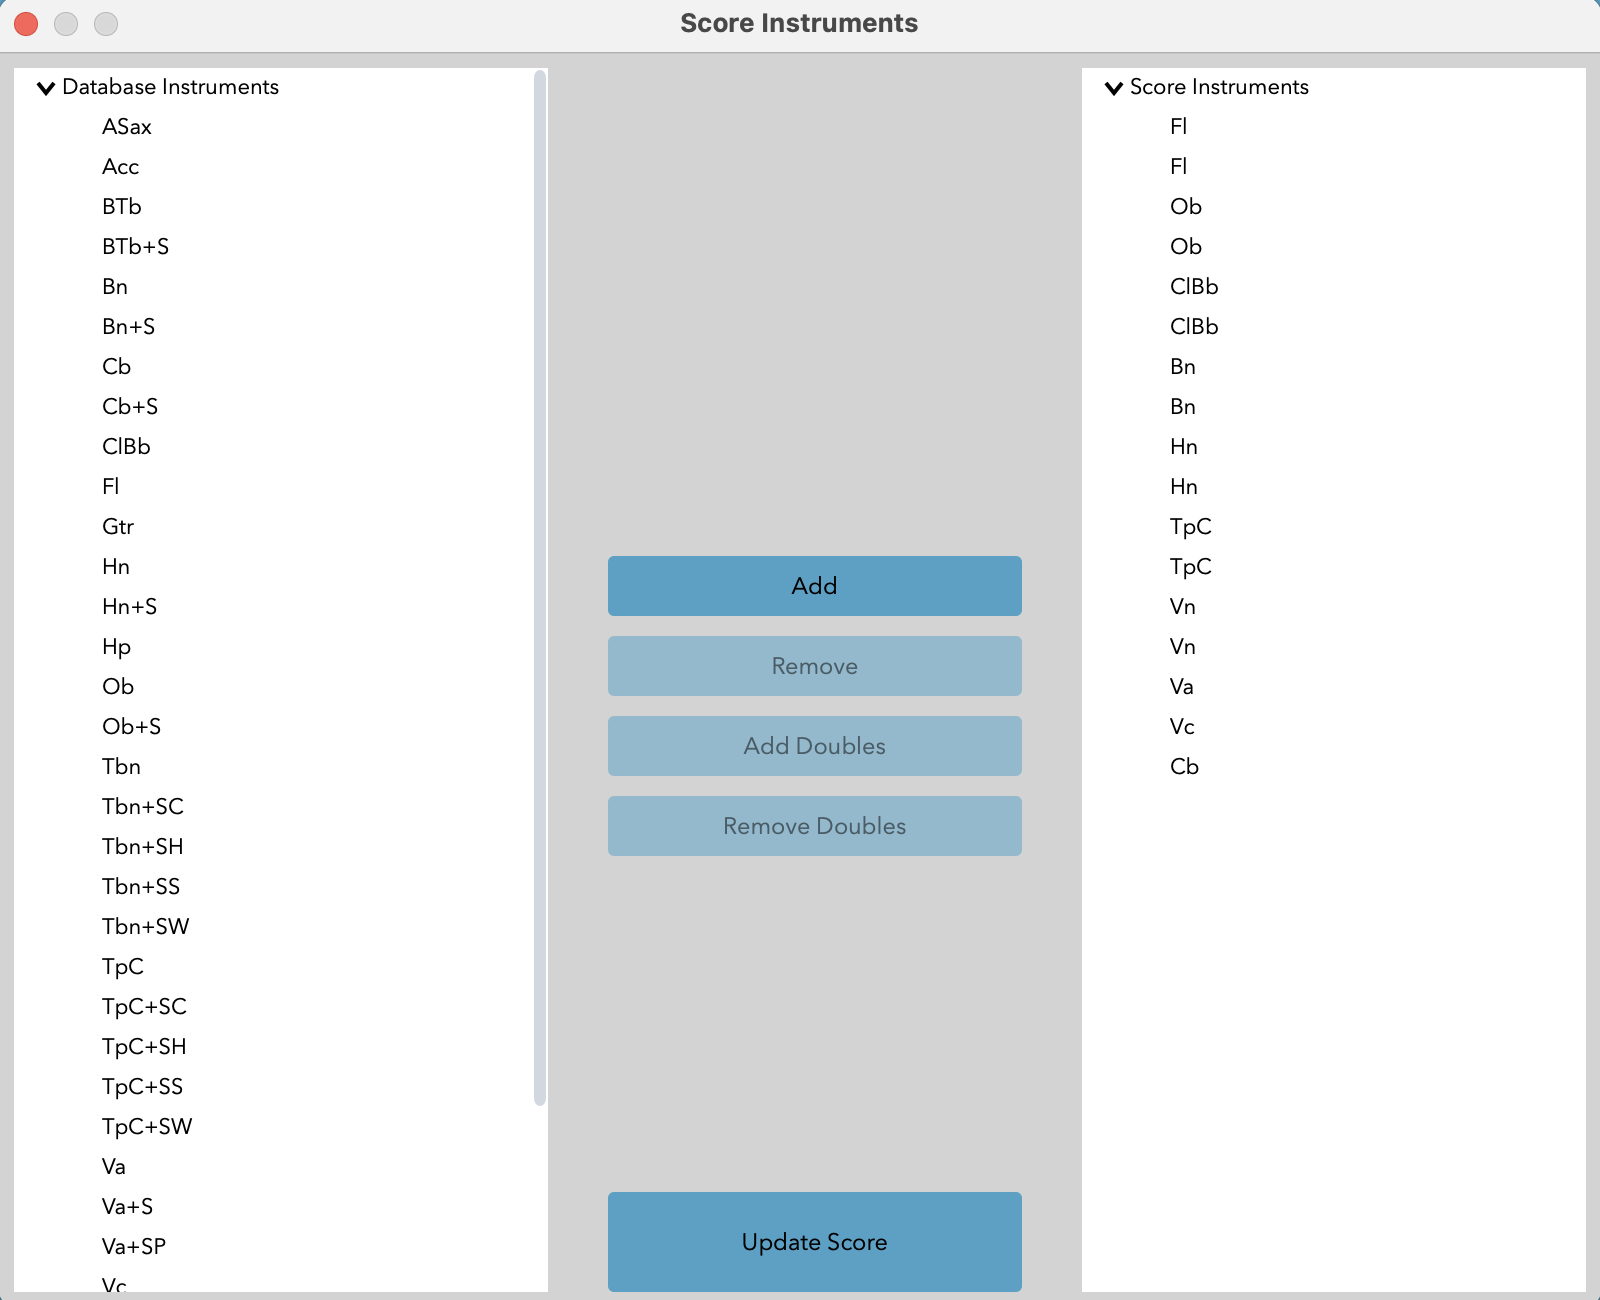
Step 2b: Overview of the Instrumentation Window
The Instrumentation Window allows you to add, remove, and reorder instruments.
Components:
- Database Instruments (Left Panel): Lists all available instruments (see IMSLP’s list of abbreviations). Use command-click or shift-click to select multiple instruments.
- Score Instruments (Right Panel): Displays currently selected instruments. Drag to reorder.
Buttons:
- Add: Adds selected instruments from the left panel to the right panel.
- Remove: Removes selected instruments from the right panel.
- Add Doubles: Adds doubled instruments from the selected Database Instruments to the selected Score Instrument.
- Remove Doubles: Removes doubled instruments from the Score Instrument.
- Close: Closes the window.
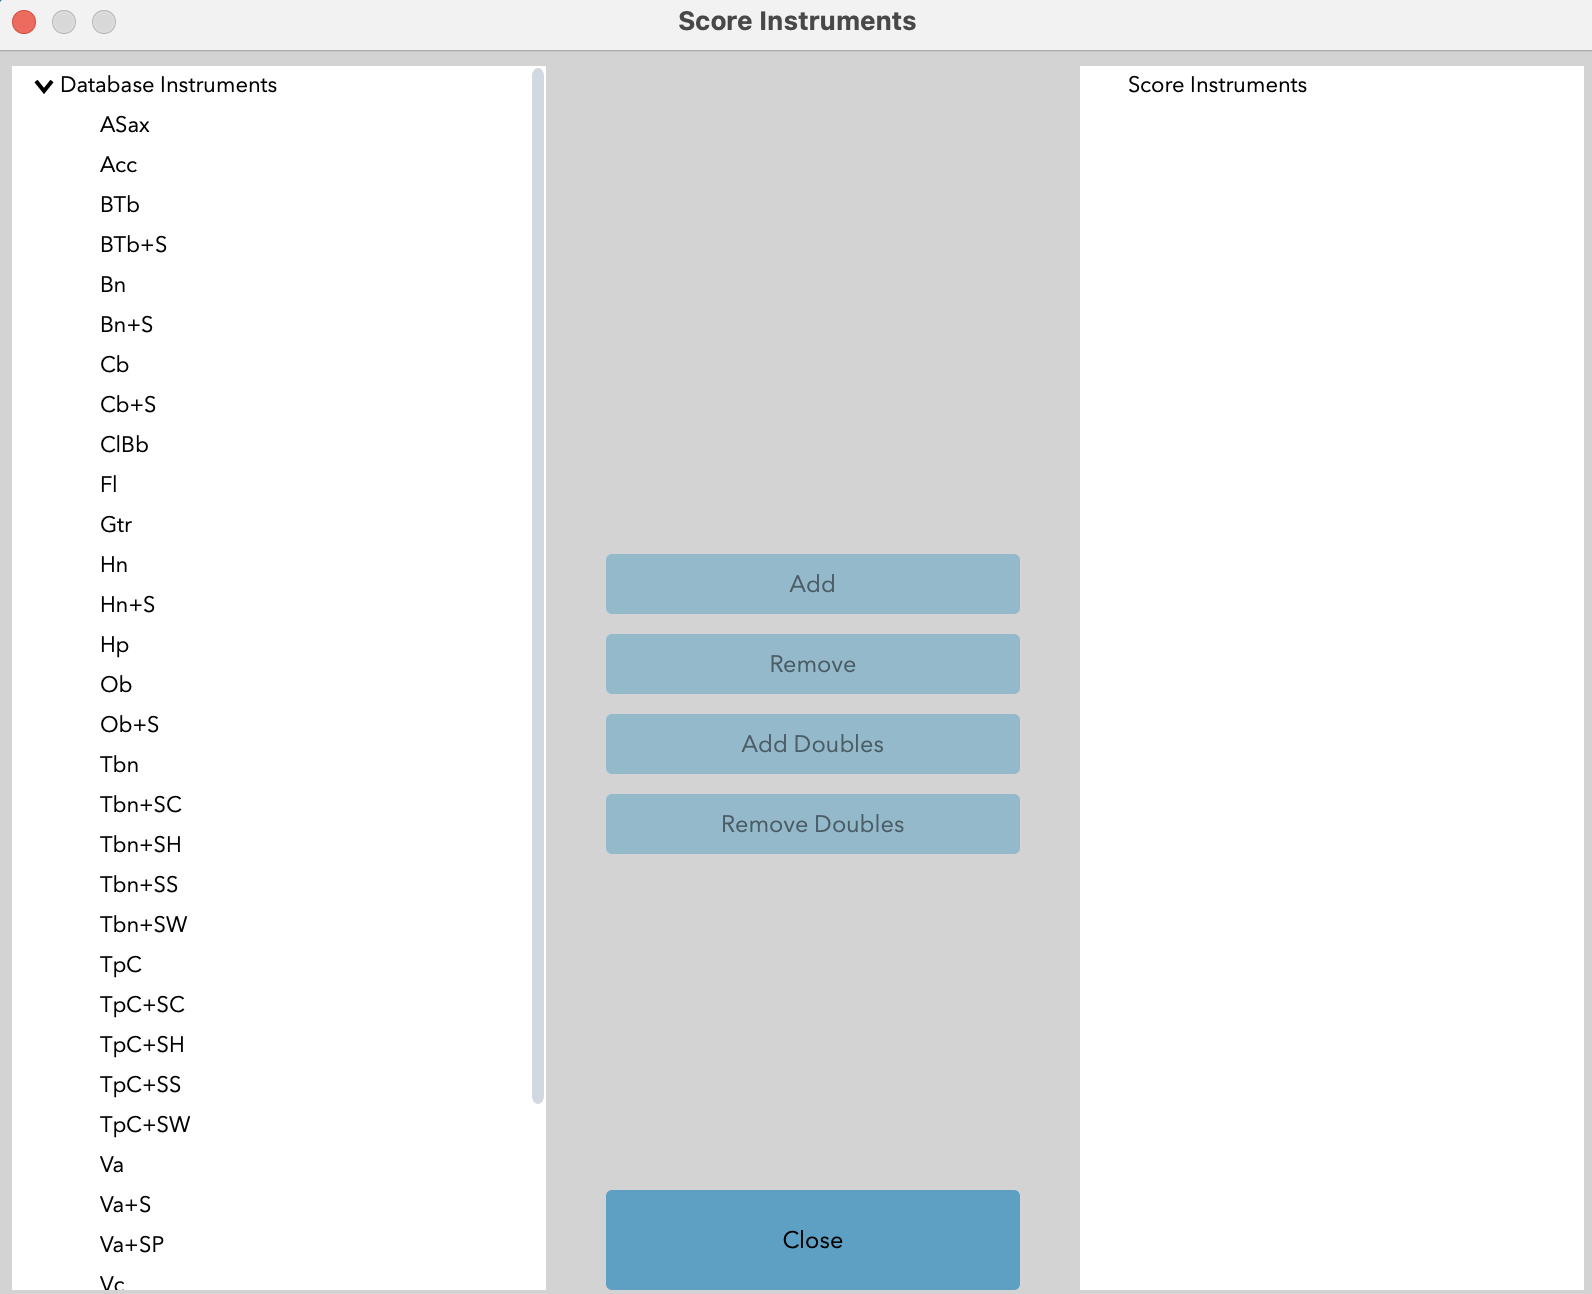
Instrumentation Window
Step 2c: Create your ensemble in the Instrumentation Window
Remember that you can change instruments at anytime in your workflow.
- Add/Remove Instruments: To add instruments to your score, select them from the left panel and click “Add.” To remove instruments, select them from the right panel and click “Remove.”
- Reorder Instruments: Drag instruments in the right panel to reorder them.
- Update Score: When finished, click “Update Score.”
Instrumentation Window, with ensemble added
Step 3: Score Window and Import Your Target Sound
Step 3a: Overview of the Score Window
Top Panel
Timestamps:
- Located at the top, marking the timing of the audio in seconds.
Waveform Display:
- Below the timestamps, shows the waveform of the target audio file. Changes to a musical notes icon after orchestration.
Playhead:
- Vertical line moving along the timeline, indicating the current playback position. Can be dragged or clicked to reposition. Space bar starts and stops playback, or use sidebar icons.

Playhead and Timeline
Score Area
Musical Score:
- Blank full score upon opening, with instrument names and clefs on each staff.
- Target or Orchestration Solution Area: Boxed or coloured/shadowed area below the waveform indicating where the orchestration will appear. Can be clicked and dragged. Notes and durations will appear here; dynamics, playing techniques, and/or tunings will appear here and can be shown or hidden in Settings.
Sidebar Icons
From top to bottom:
- Play: Starts playback.
- Return to Start: Moves the playhead to the beginning.
- Loop: Toggles looping of playback. (Note: may not work in current version)
- Orchestrate: Initiates the orchestration process.
- Inspector: Opens the inspector panel for detailed orchestration settings.
- Add/Remove/Reorder Instruments: Manages the instruments in the score.
- Mixer: Opens the mixing panel.
- Settings: Opens the settings window.
Menu Bar
Overview: (detailed description can be found here)
- File: Manage projects (New, Open, Save, Export, etc.).
- View: Adjust the visual aspects of the interface (Zoom, Score Instruments, Settings, etc.).
- Edit: Undo and redo actions.
- Controls: Playback controls (Play, Rewind, Loop).
- Target: Add or delete targets, export options.
- Help: Access help documentation and resources.
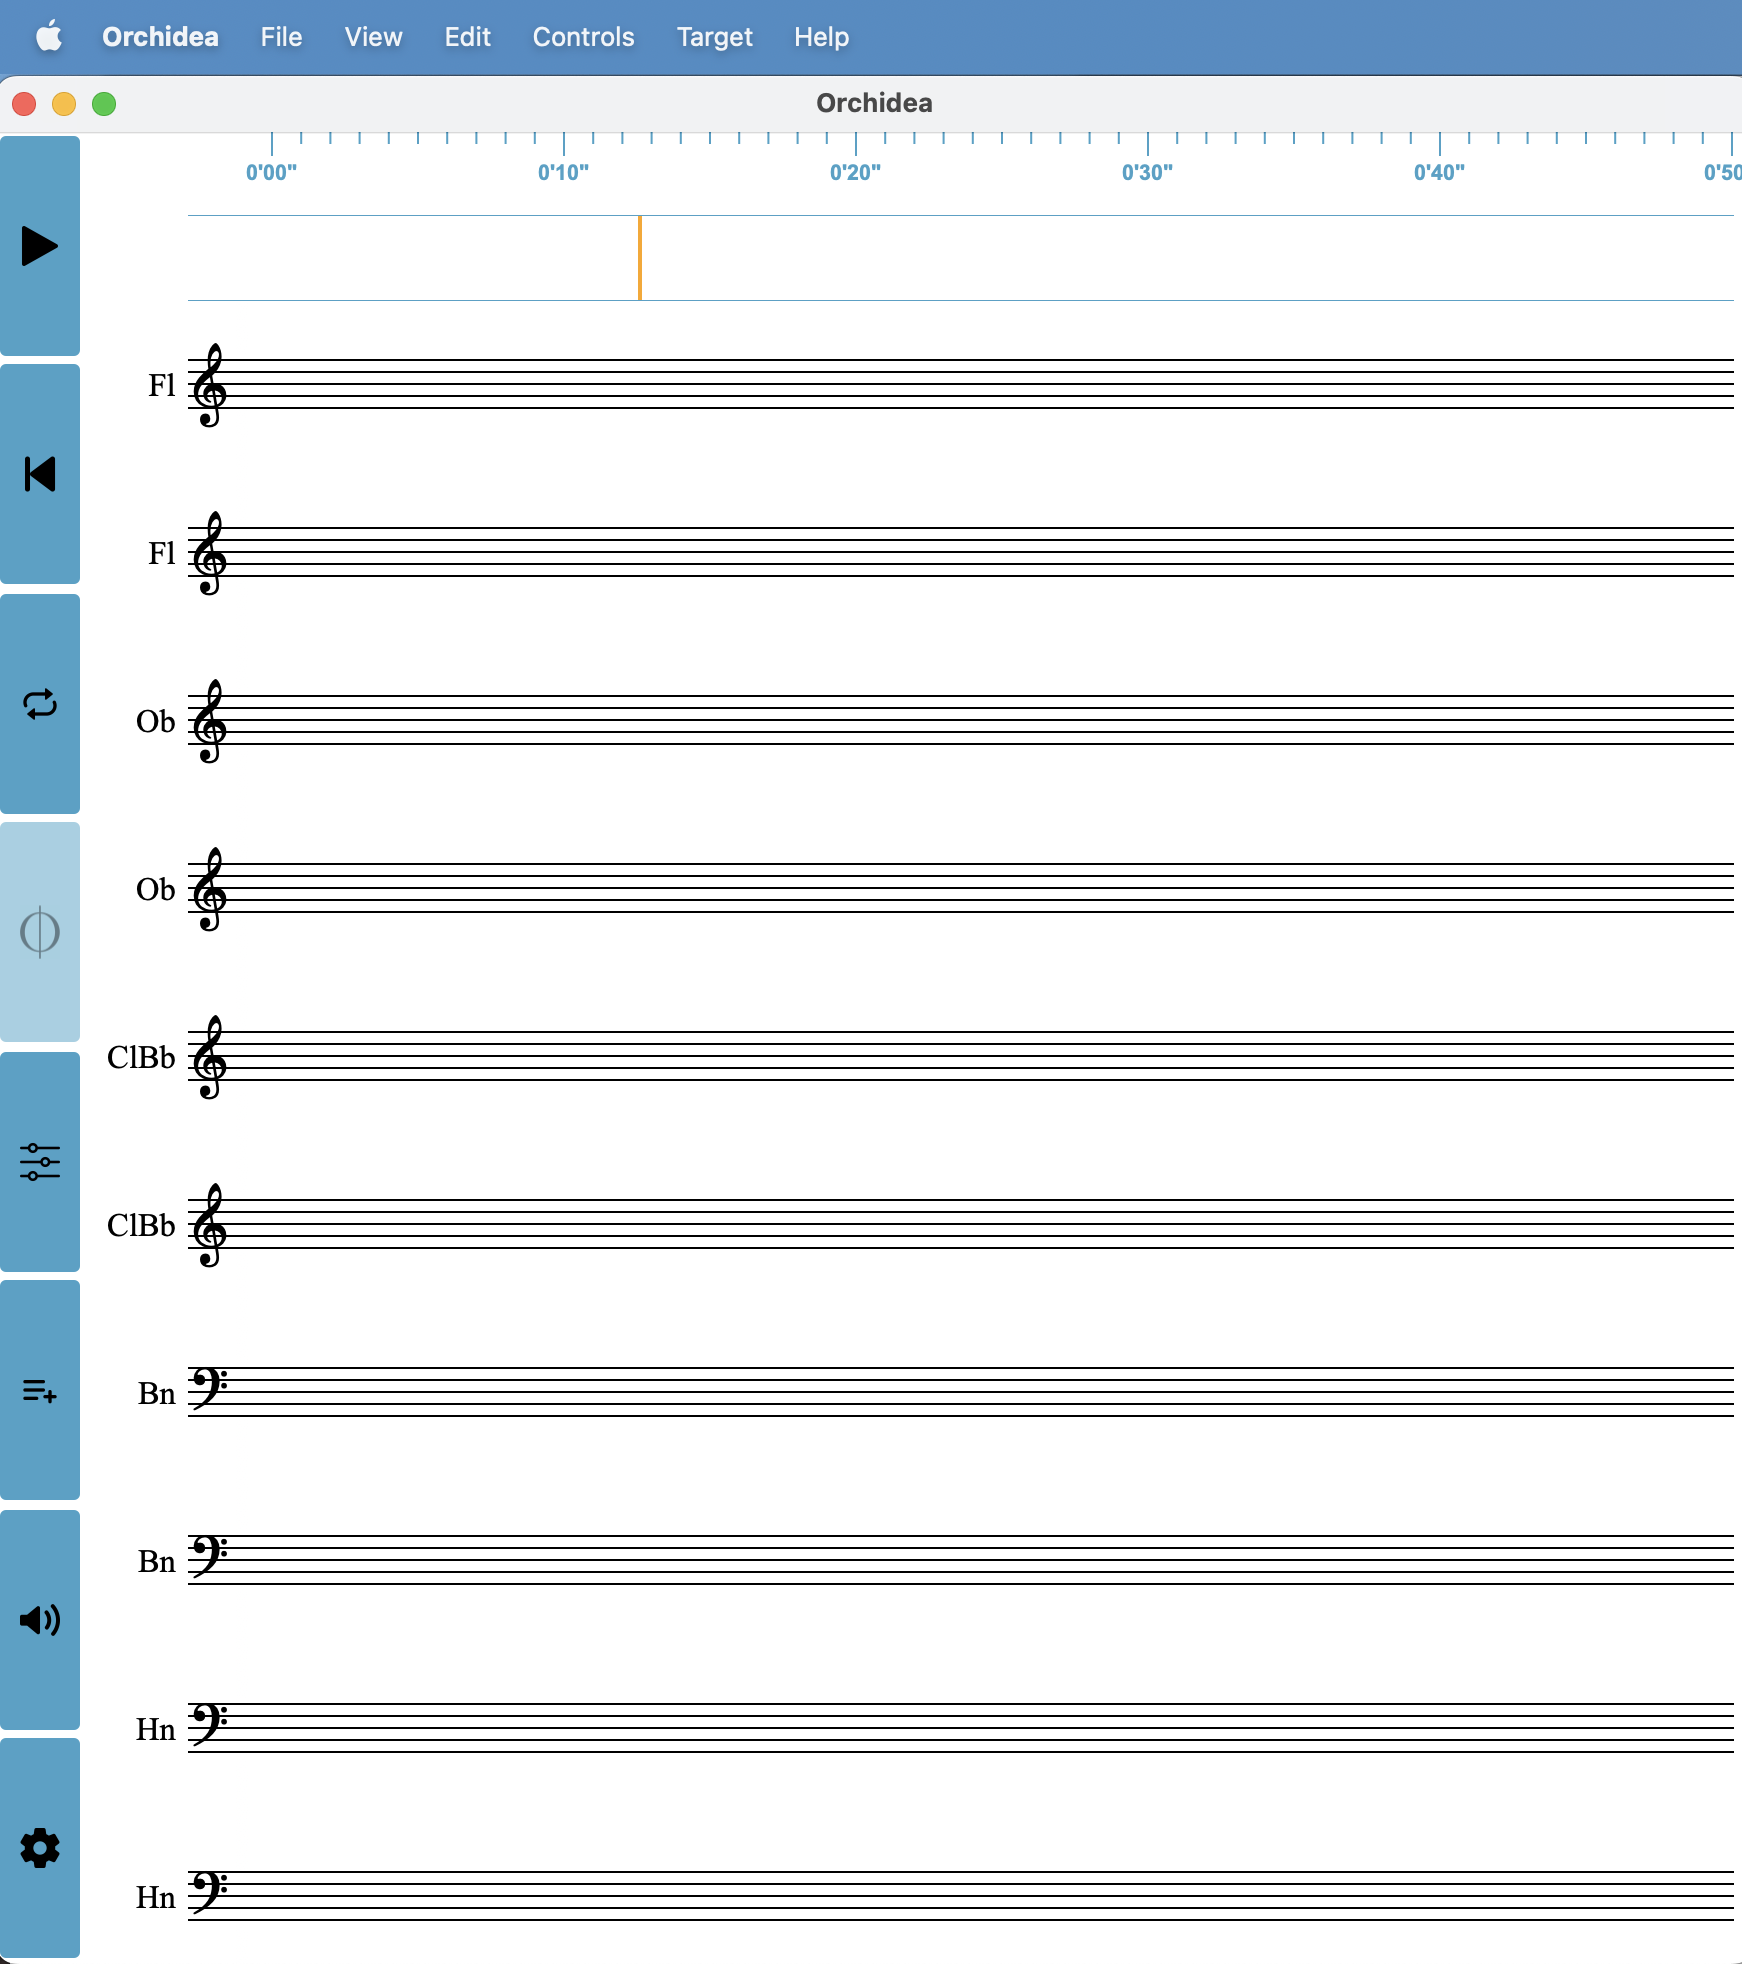
Empty Score Window
Step 3b: Adding the Target Sound
This step involves loading a target sound into Orchidea, which will then be orchestrated.
Note: Ensure the sound file is of good quality, preferably .wav or .aif with 16bit 44.1kHz, to avoid orchestrating background noise.
Import Target Audio:
- Drag and Drop: Drag your audio file onto the score.
- Menu Bar: Go to Target > Add Target (Note: may not work in current version).
Play Audio:
- Move the playhead to the desired start time.
- Press the space bar or click the sidebar play button to start playback.
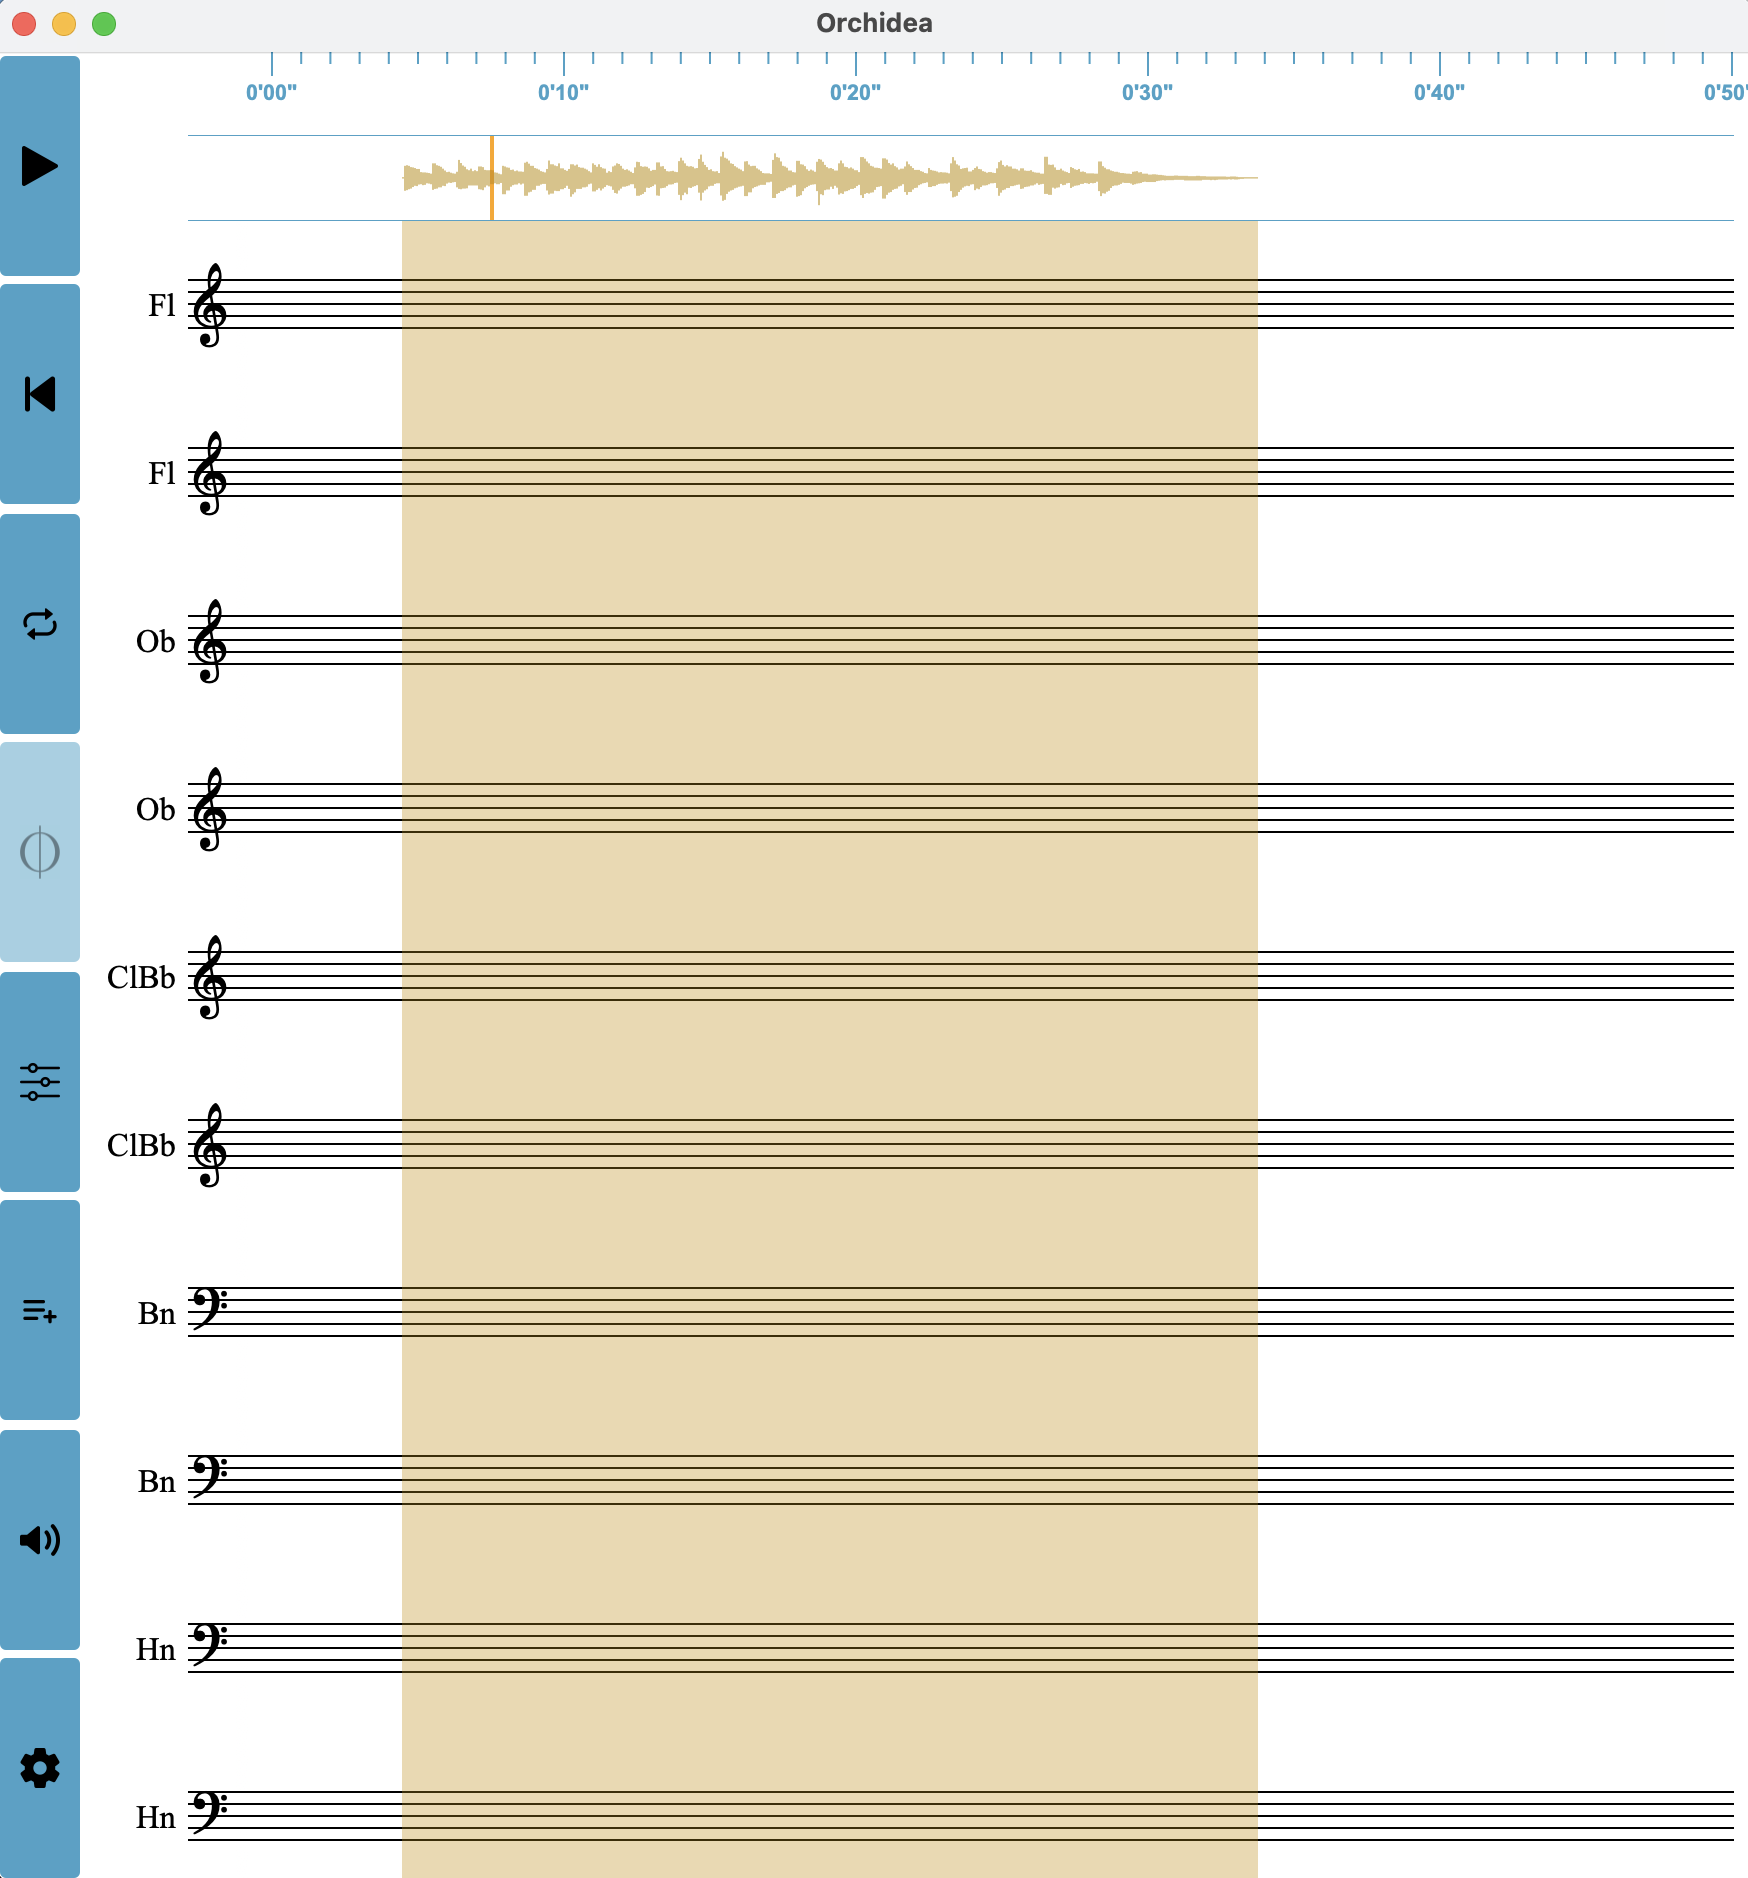
Score Window with audio file loaded
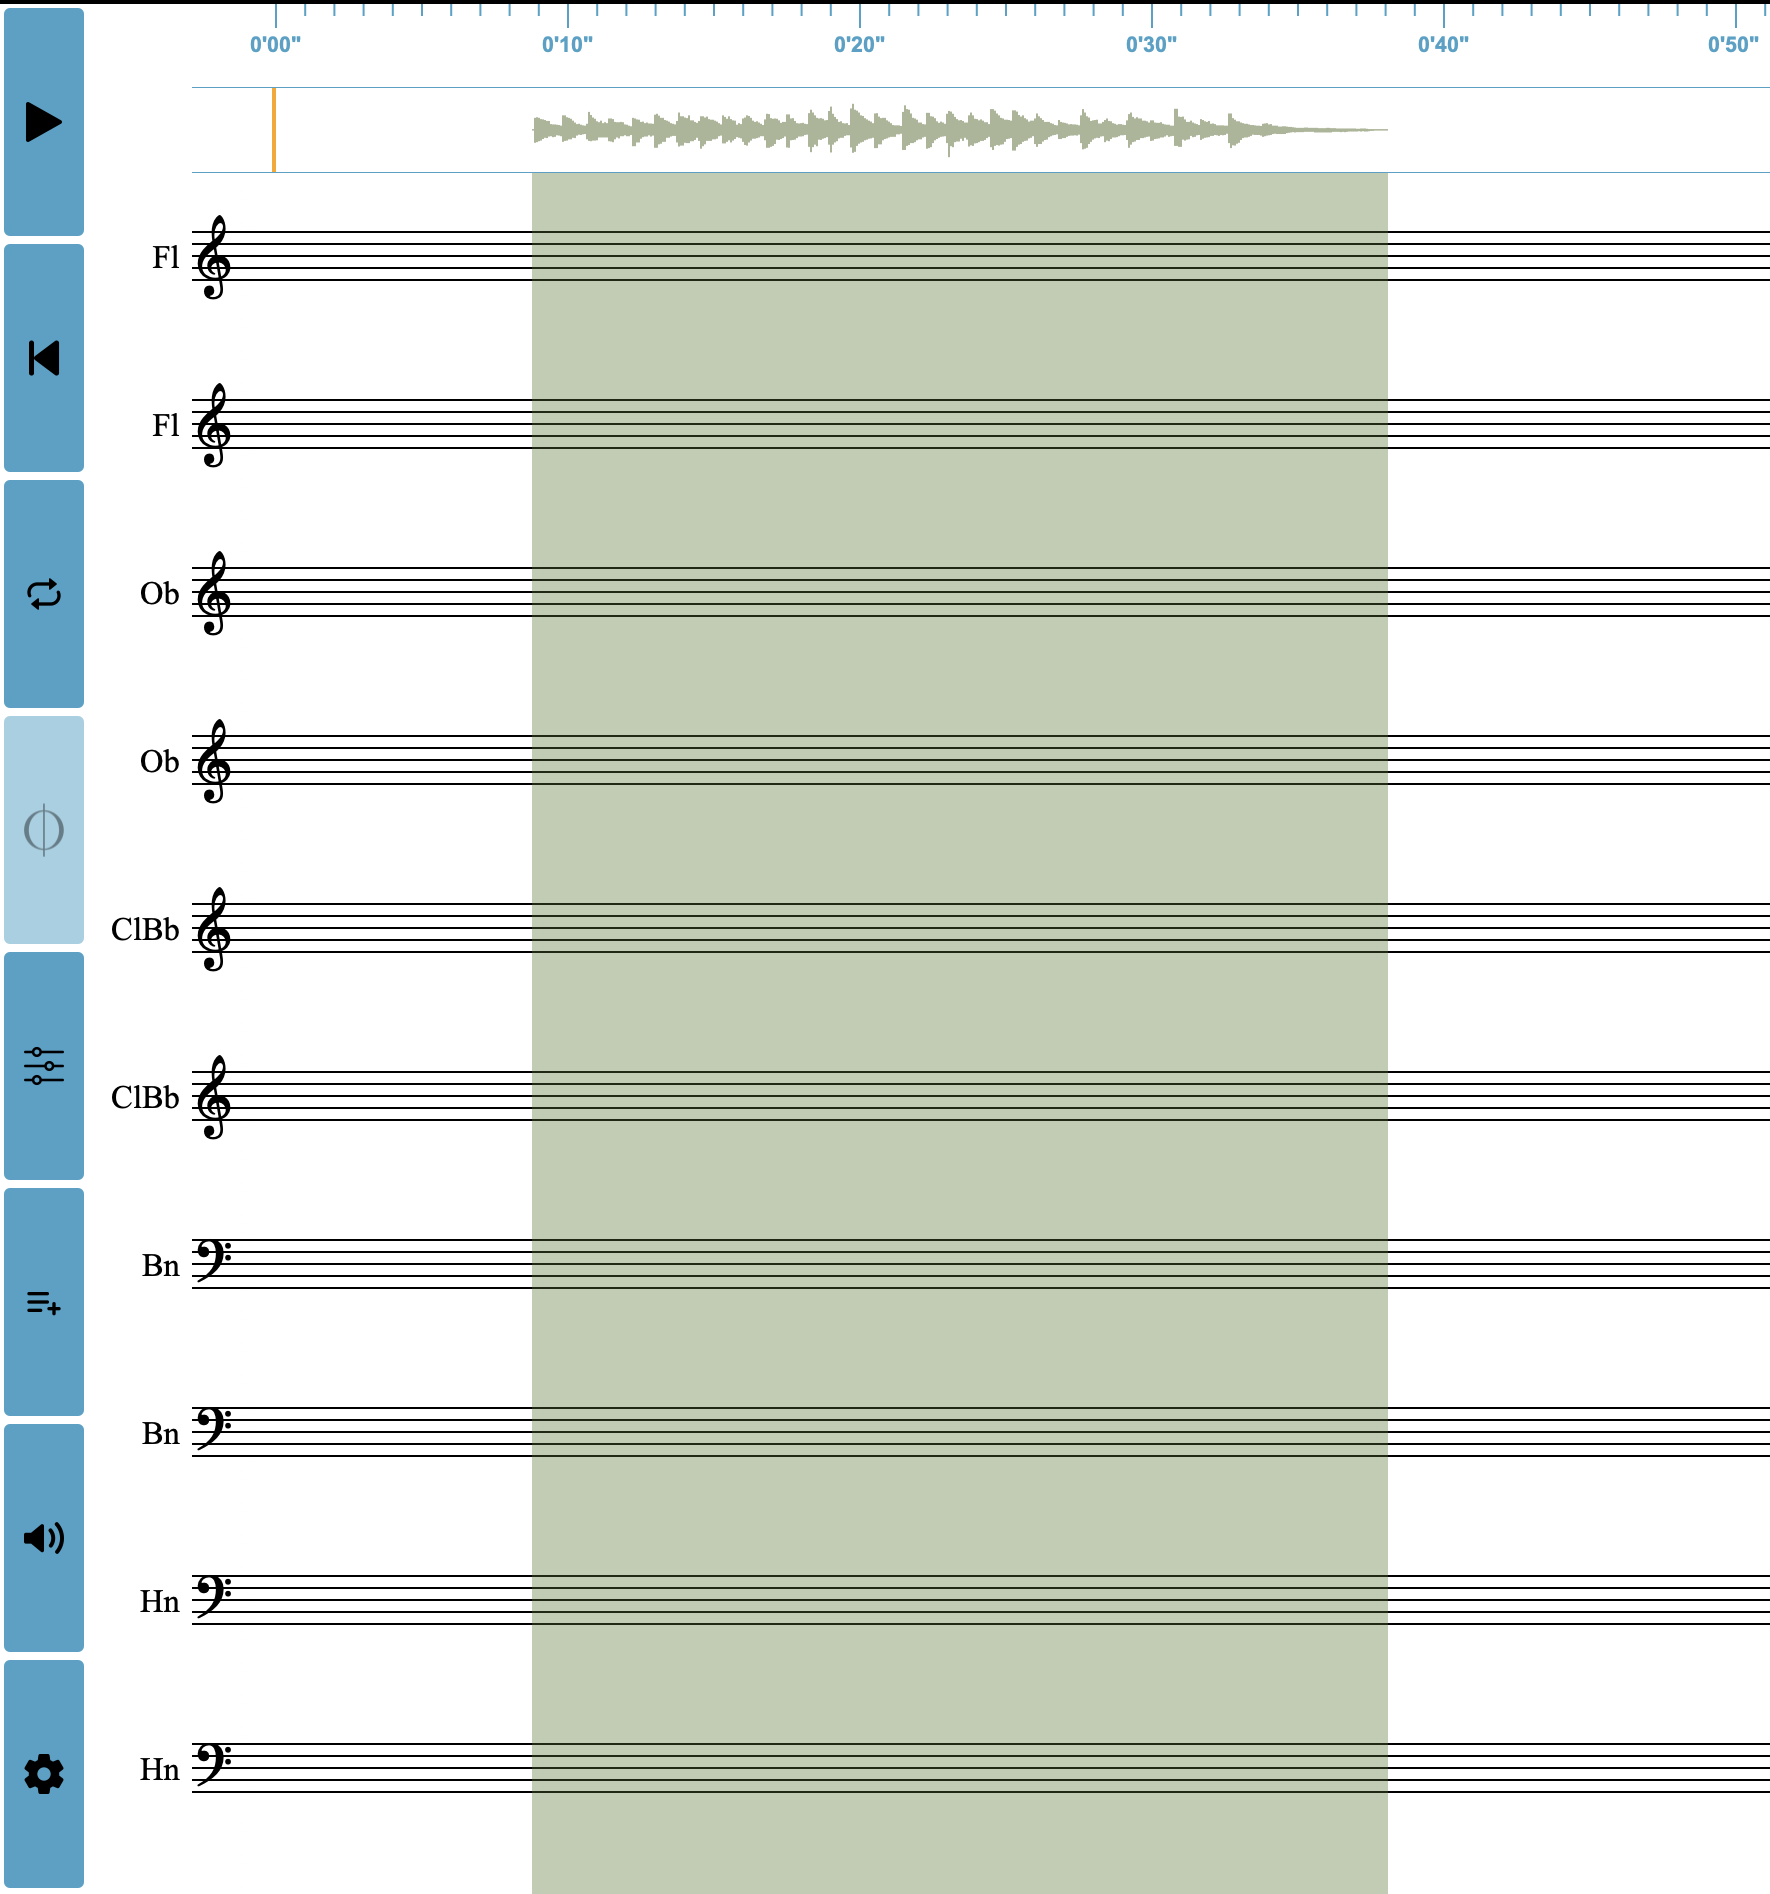
Step 4: Orchestrate My Idea!
Orchestrate Your Target File
- Select the Target:
- Click the coloured/shadowed area in the score below the waveform of the target audio file to select it for orchestration. Once selected the sidebar Orchidea icon won’t be grayed out anymore; this means you can now orchestrate!
- Start Orchestration:
- Click the “Orchestrate My Idea” button to begin the process.
- A message such as “0’s and 1’s” or “Segmentation…” will briefly appear where the waveform was, indicating the computer is processing the orchestration. This visual cue shows that Orchidea is analyzing the target file to generate the orchestration.
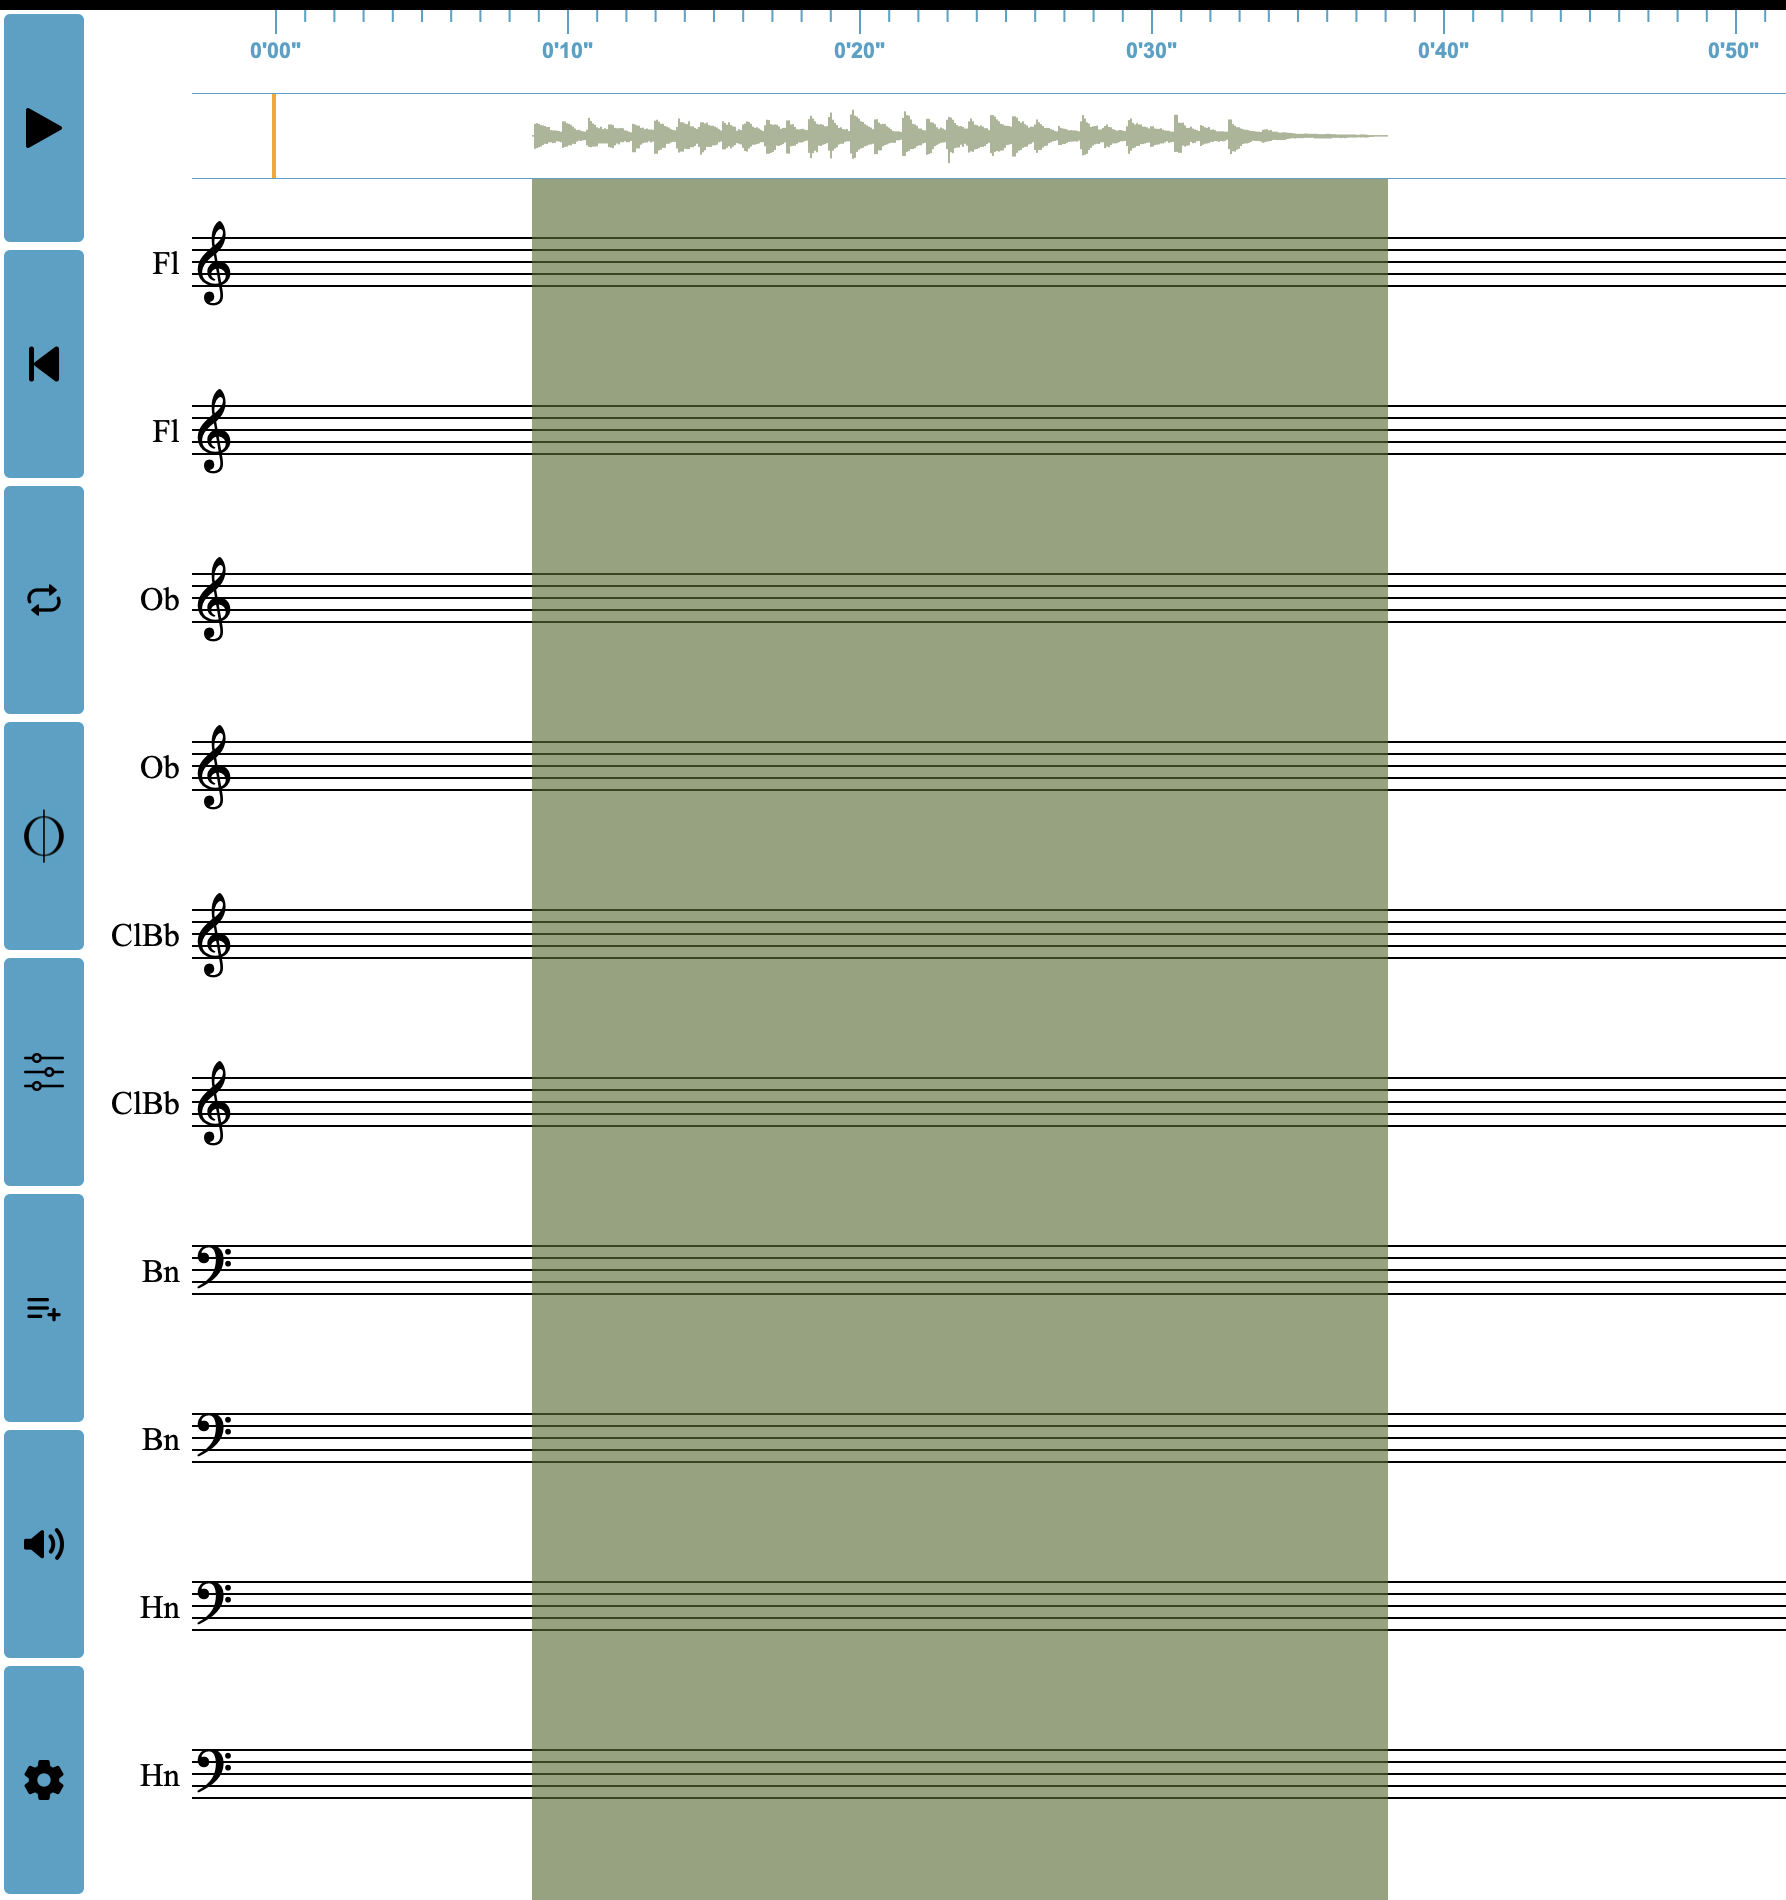
Audio file before selection
Audio file and Orchidea button after selection
Static Orchestration:
- Once the process is complete, Orchidea will generate a chord or what is termed a Static Orchestration, and the notes will appear in the shadowed area, complete with dynamics and playing techniques or tunings as specified in the Settings.
- Note: this happens even if your audio file is quite complex! The software averages out the sound; interesting concept to explore pedagogically in future tutorials, i.e., what is the “average” or macrocolour of a section or a work.
- Press play to listen to your orchestration.
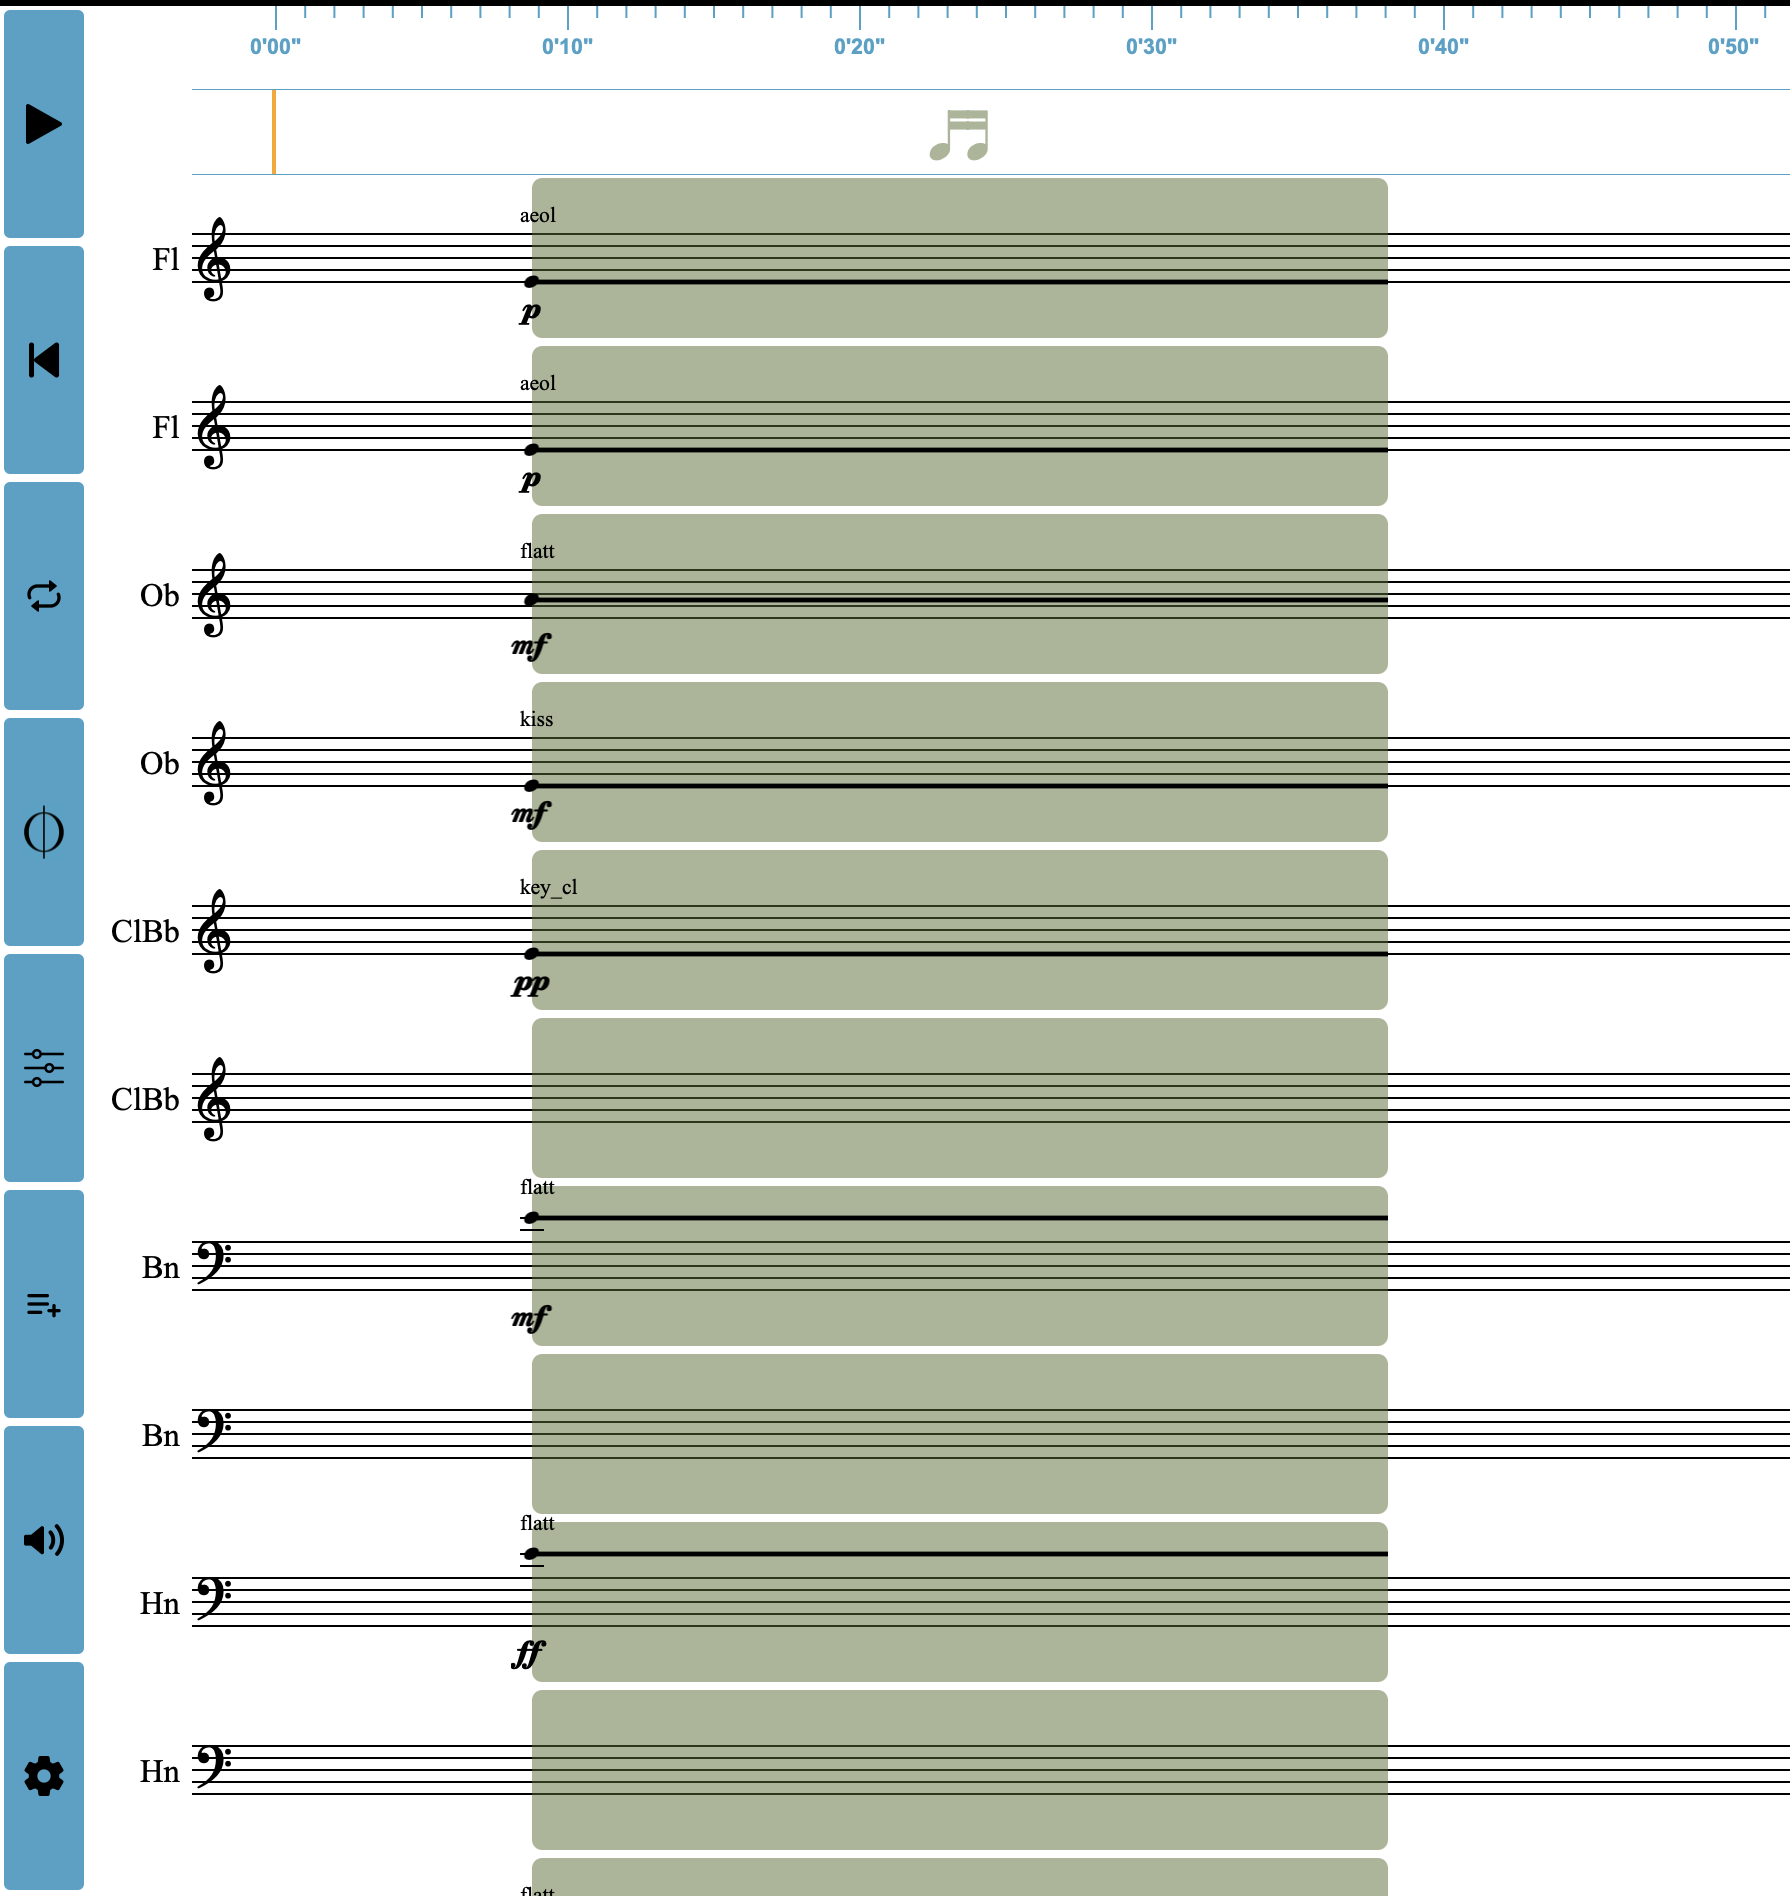
A chord or static orchestration
Dynamic Orchestration
If your audio file is complex and you want to hear a time-varying orchestration, follow these next steps:
- Open Inspector:
- Click the Inspector icon to expand the sidebar. The Inspector provides detailed options for refining your orchestration.
- Adjust Threshold:
- In the Inspector, find the Threshold slider in the Segmentation section. Move it from 1.0 down to 0 or just above 0, for the most segmented, or most dynamic, orchestration.
- Leave other default settings as they are for now.
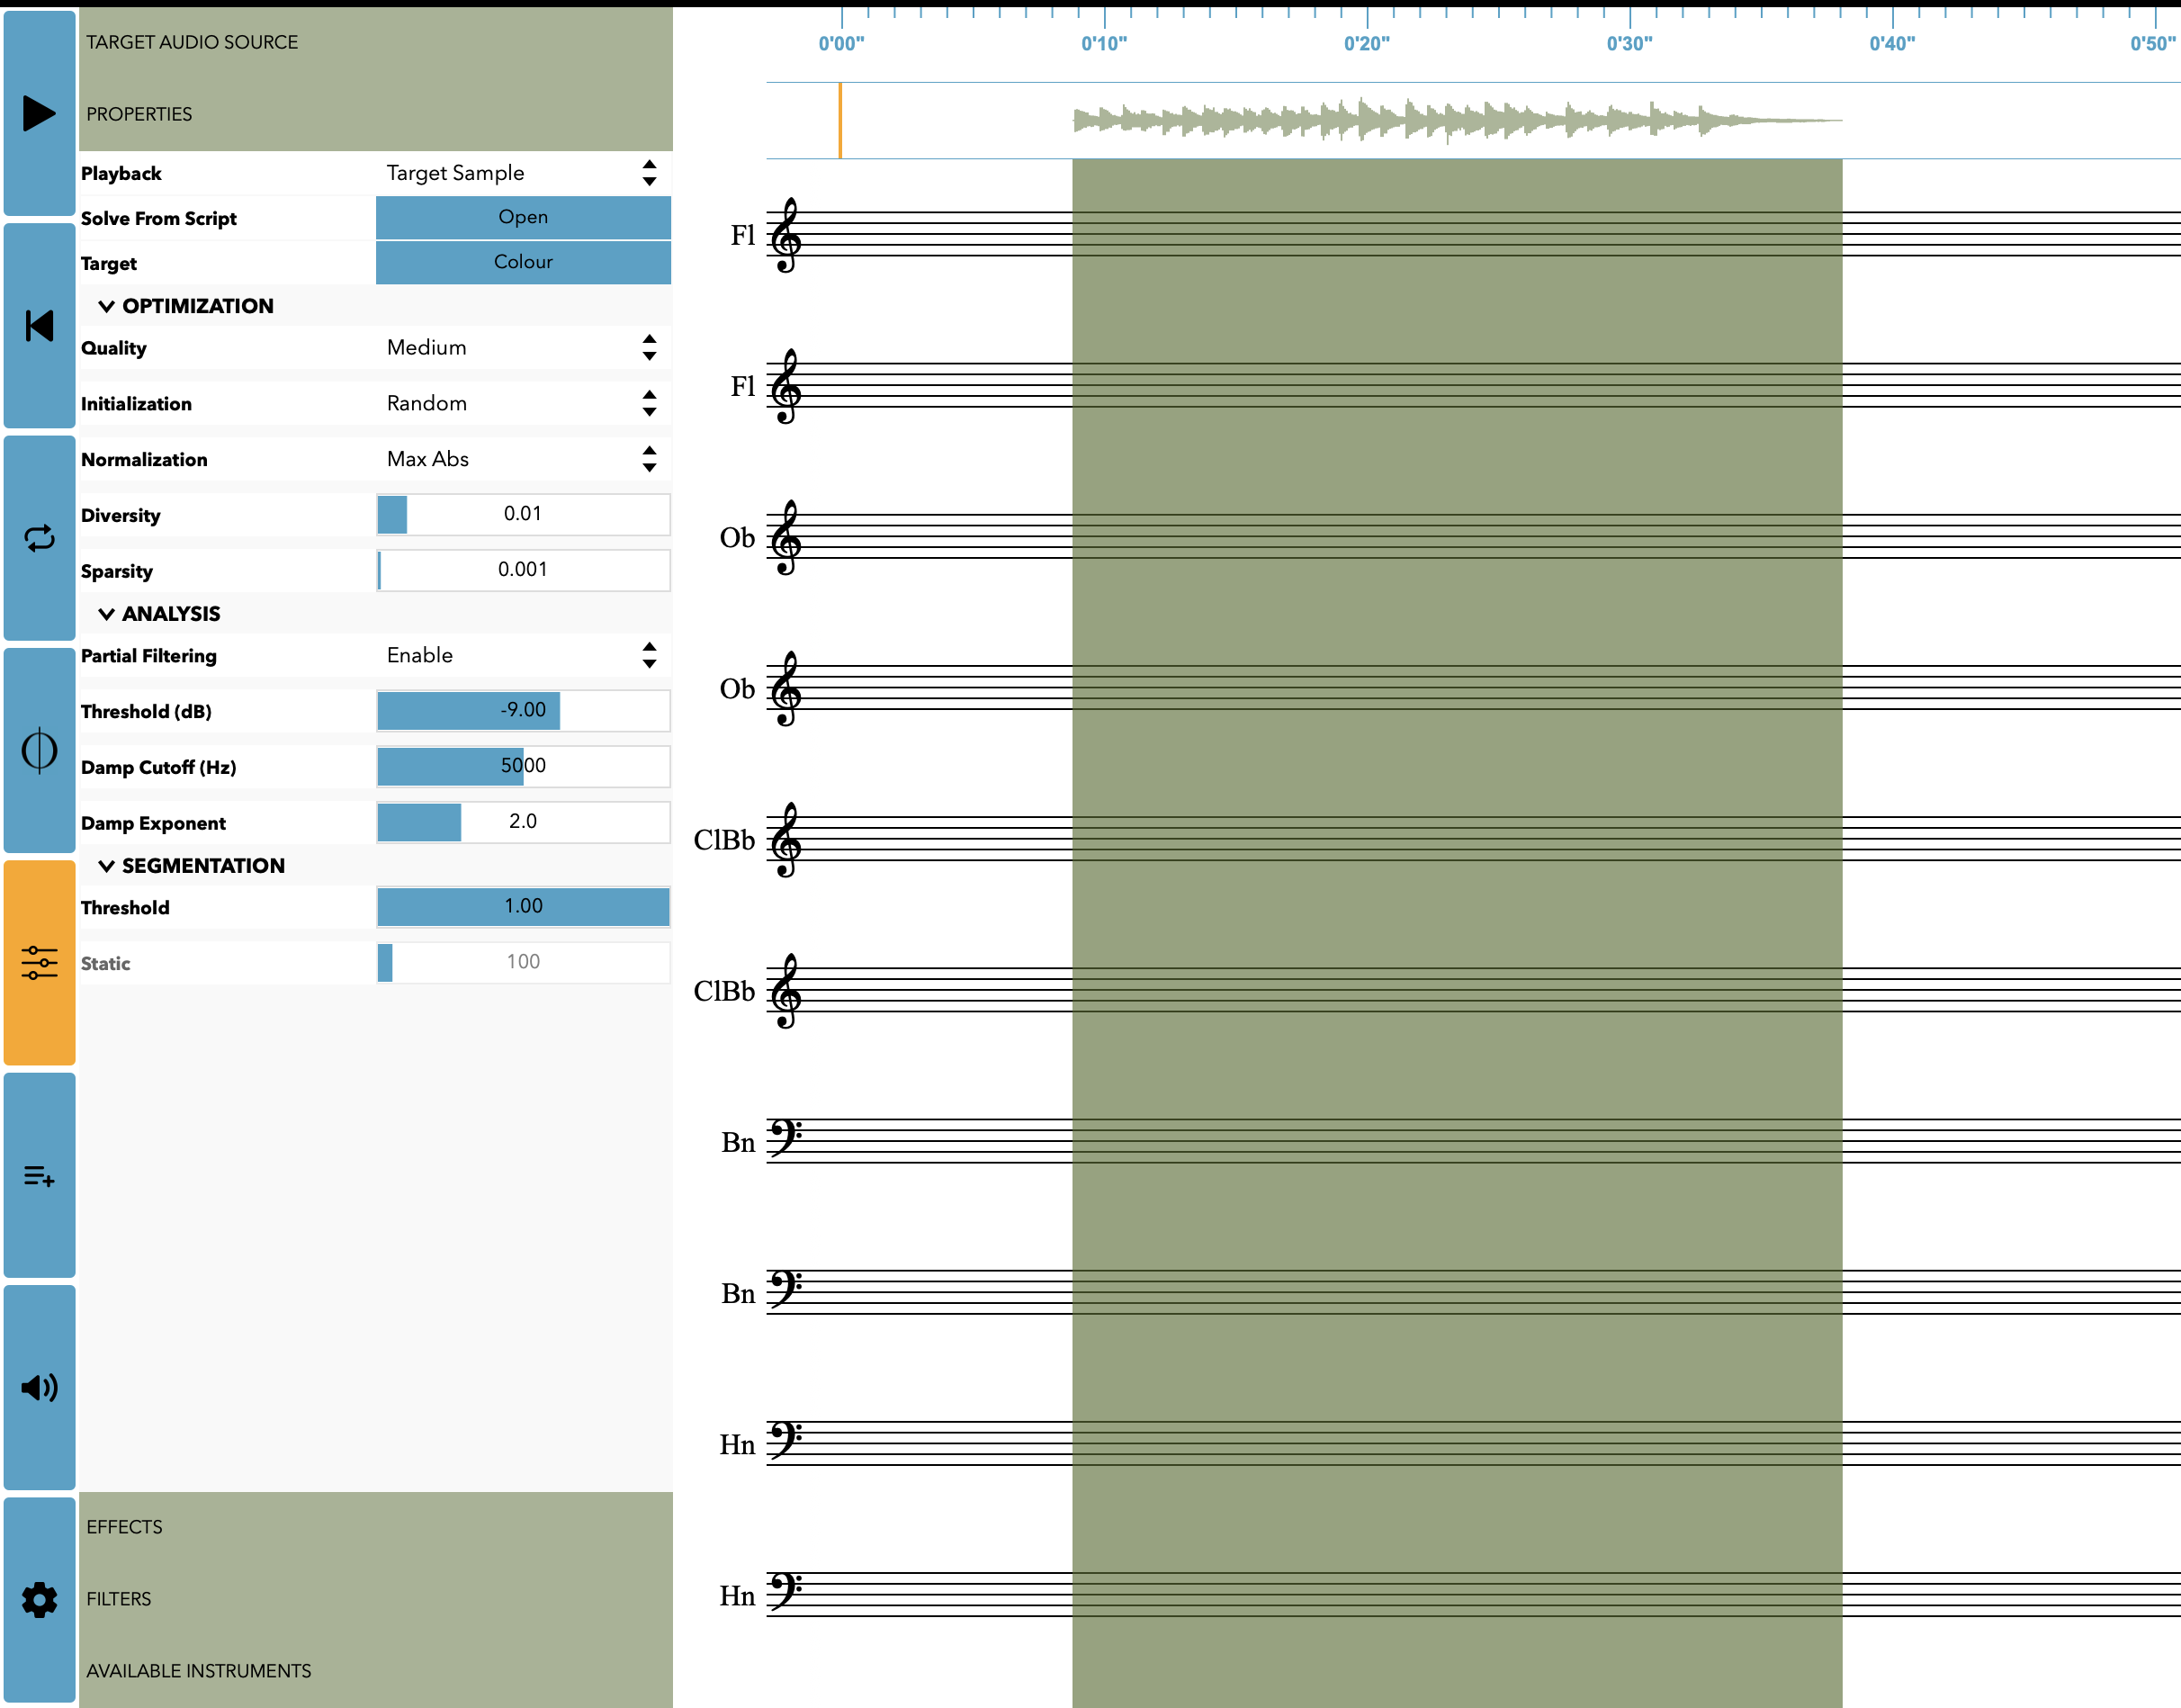
Inspector: Threshold at 1 = Static Orchestration (the setting we used for the above orchestration)
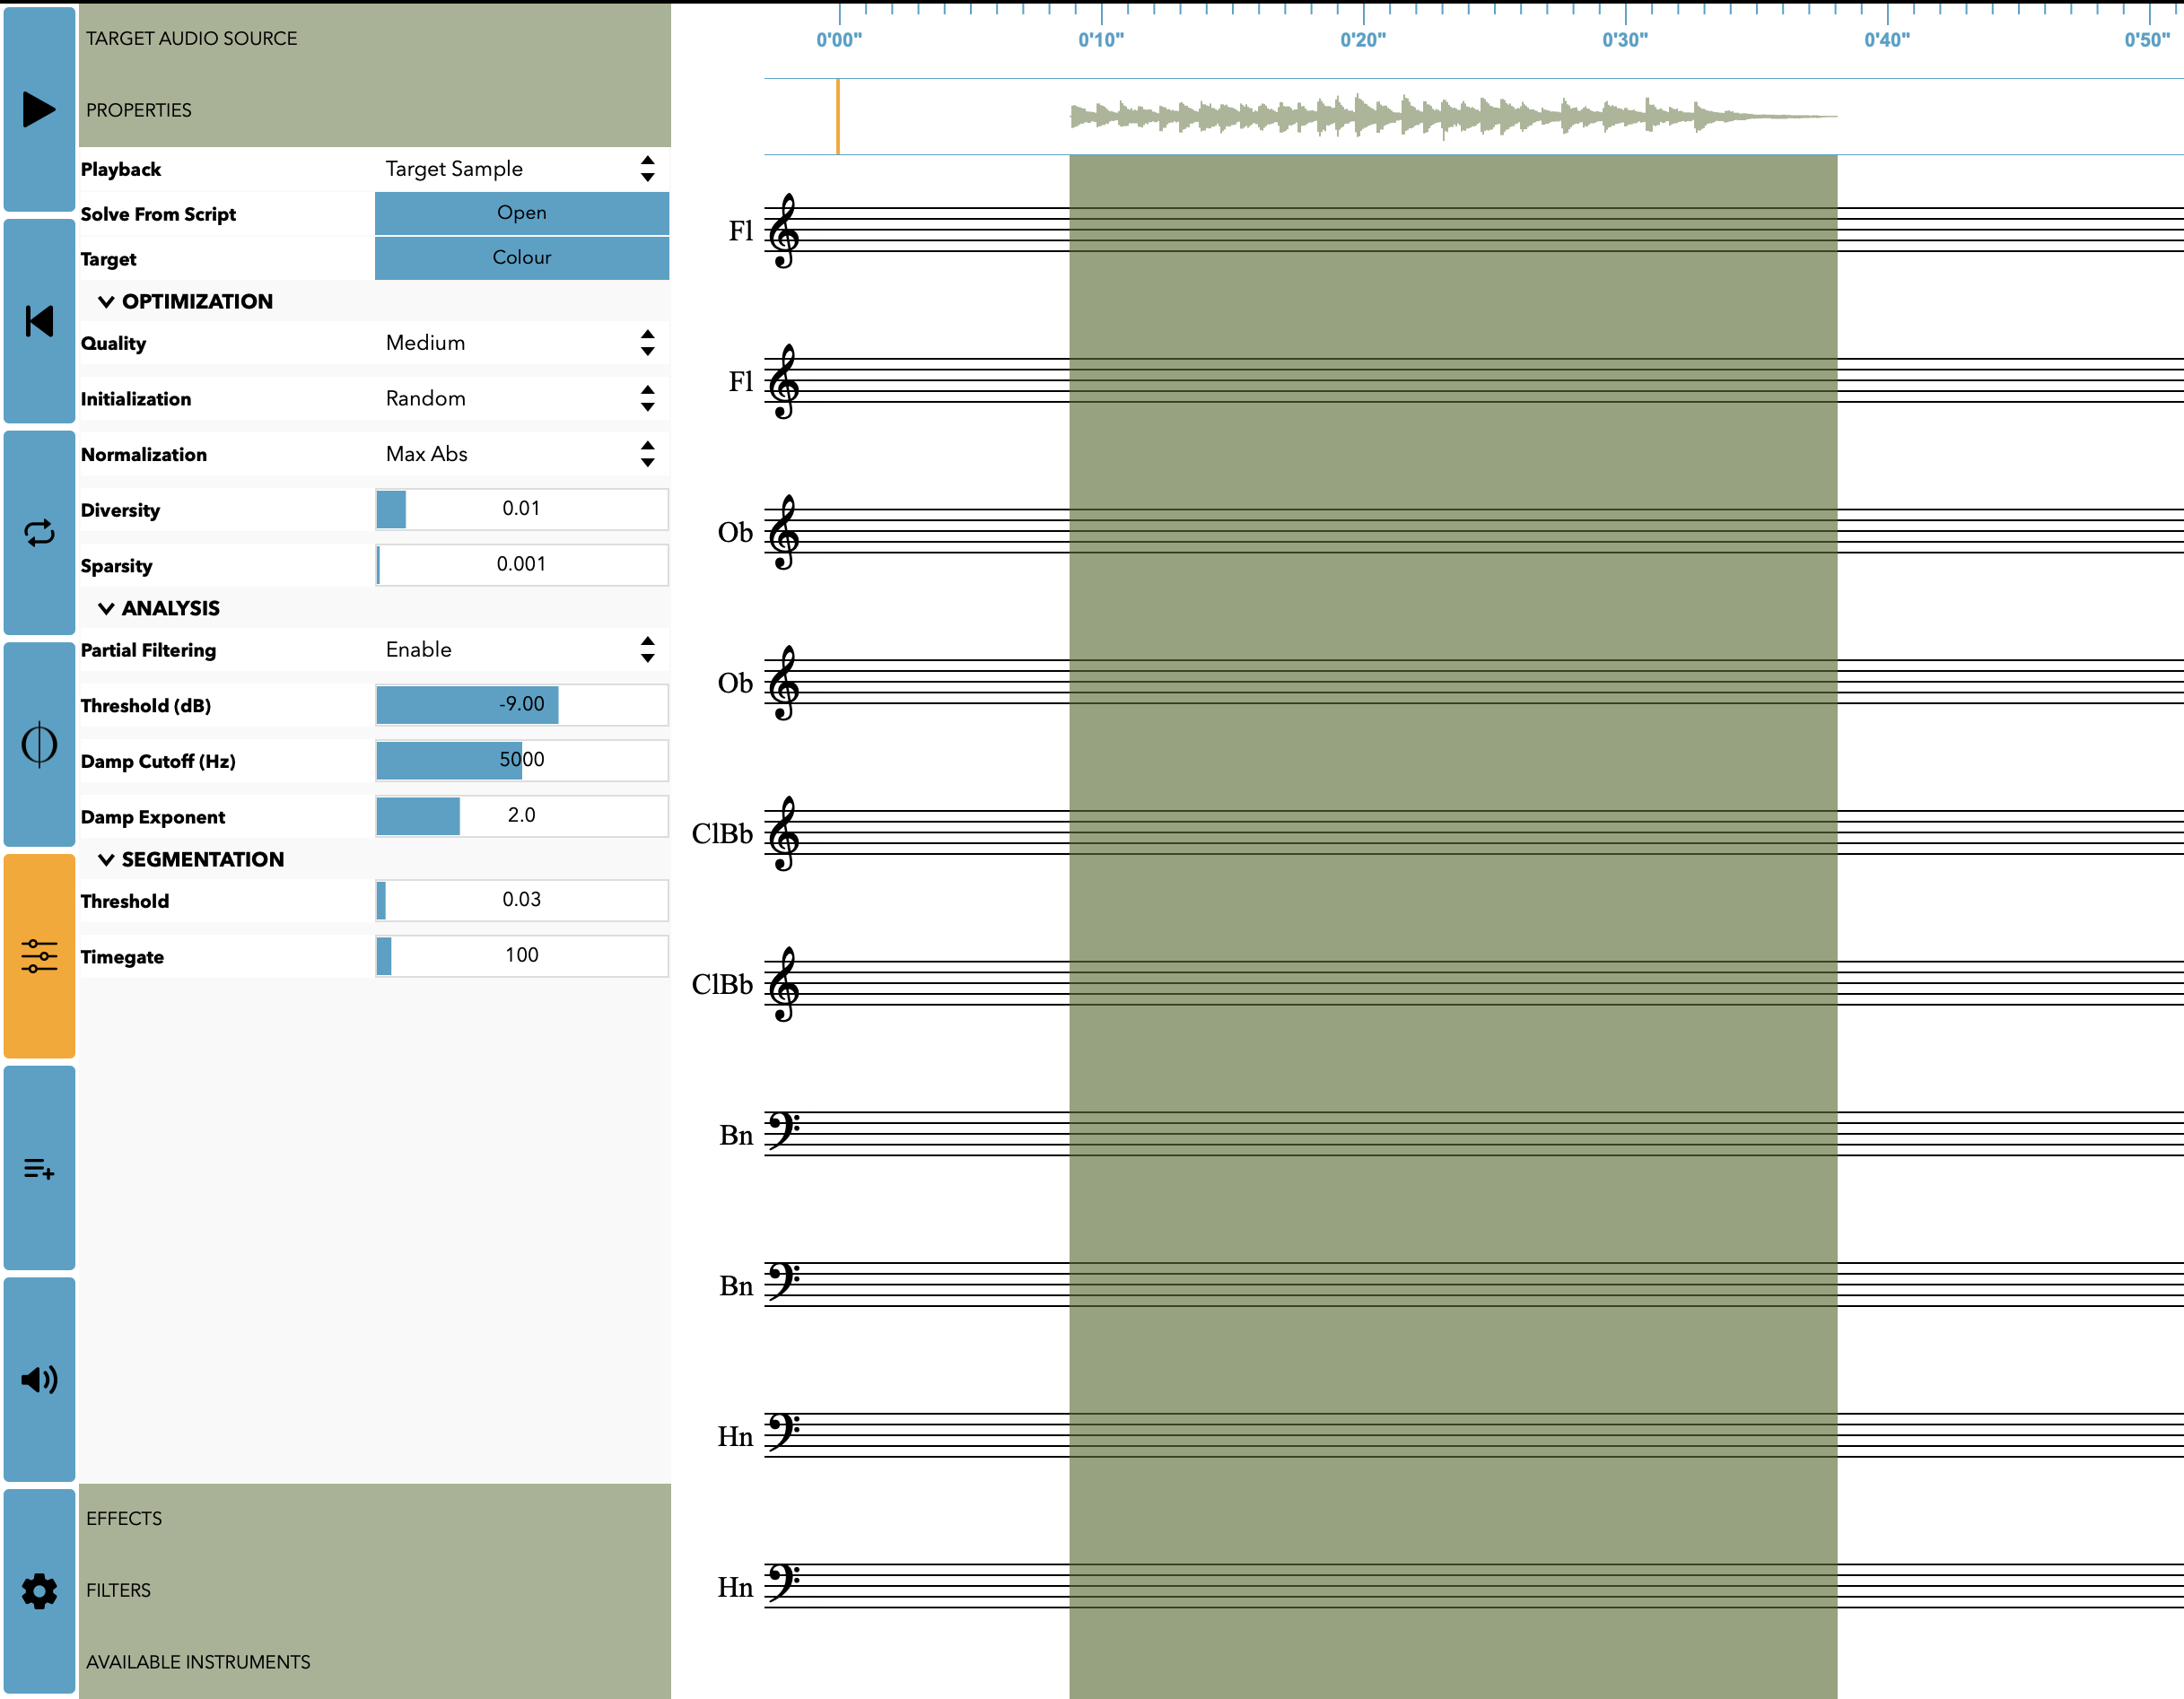
Inspector: Threshold at 0.03 = Dynamic Orchestration
- Generate Dynamic Orchestration:
- If your target sound is a time-varying sound (e.g., a sound changing over time), clicking Orchestrate this time will produce a Dynamic Orchestration. This means the orchestration will evolve over time, mirroring (as much as possible, depending on the database and the filters) the changes in the target audio.
- Playback and Review:
- your orchestration is quite complex, then it may be necessary to hide the dynamics and playing techniques in the Settings, so you can see the score more clearly.
- Press play to listen to your new dynamic orchestration!
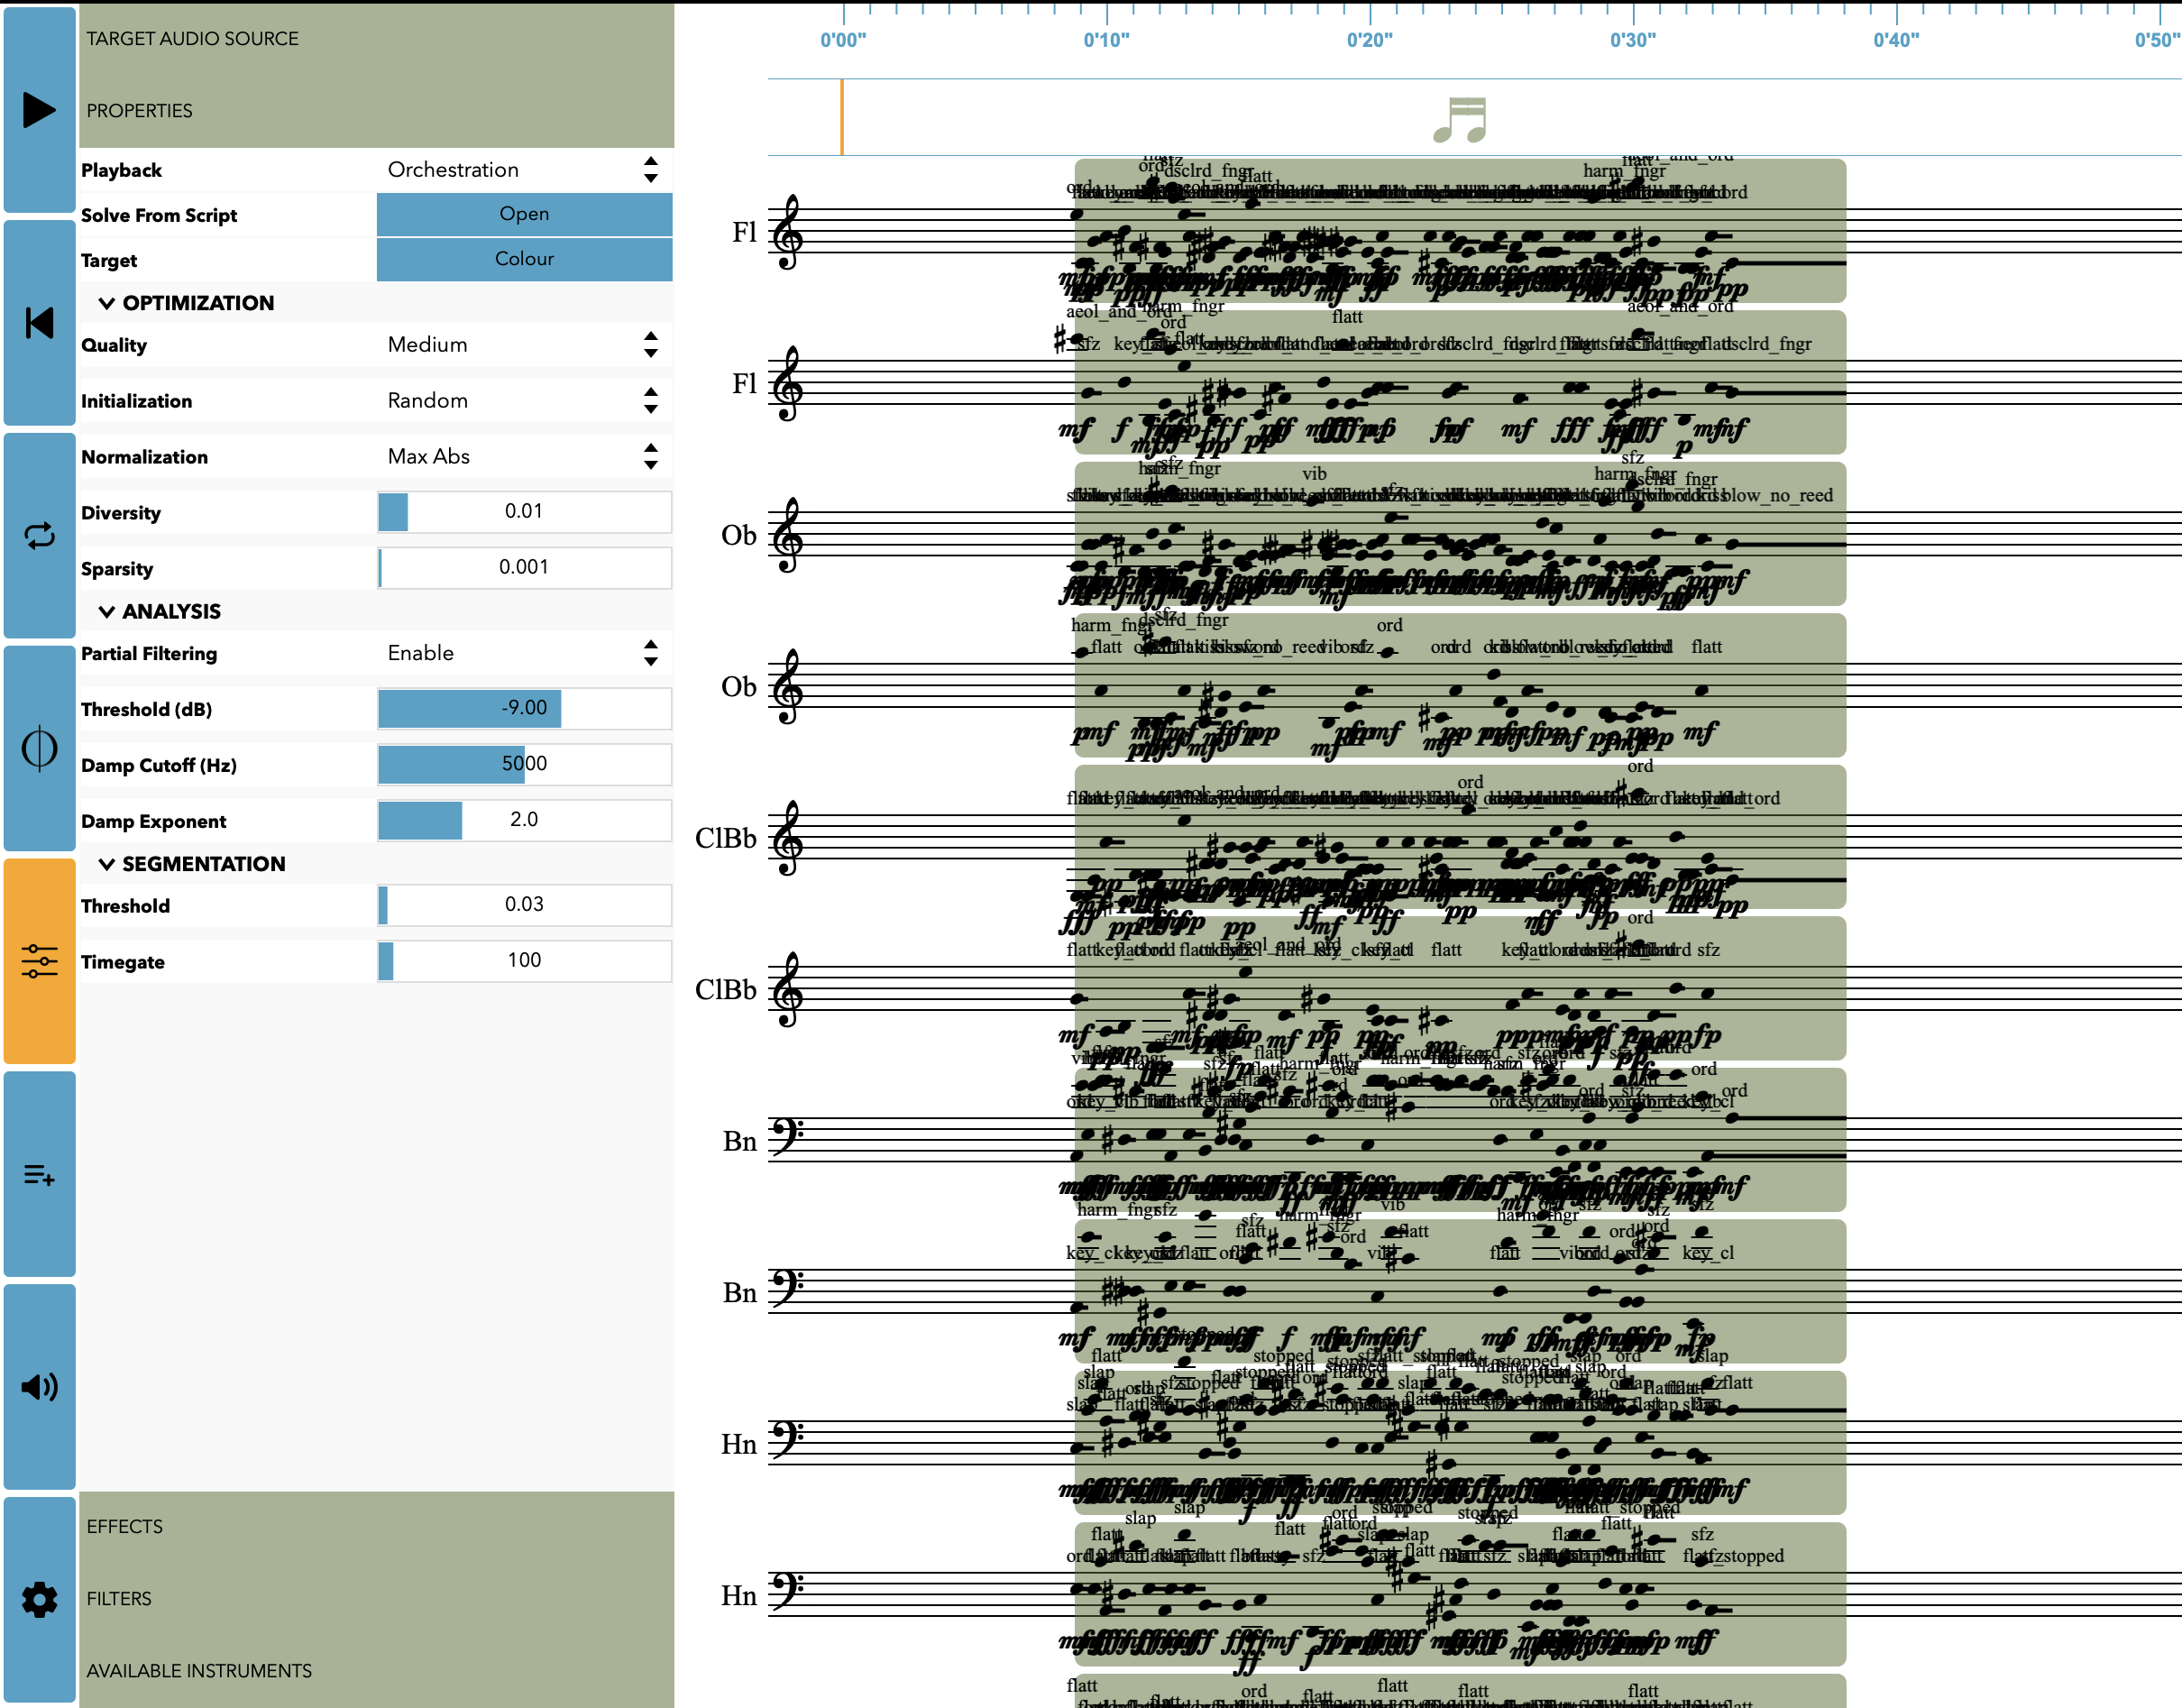
Dynamic Orchestration! With Dynamics and Playing Techniques showing
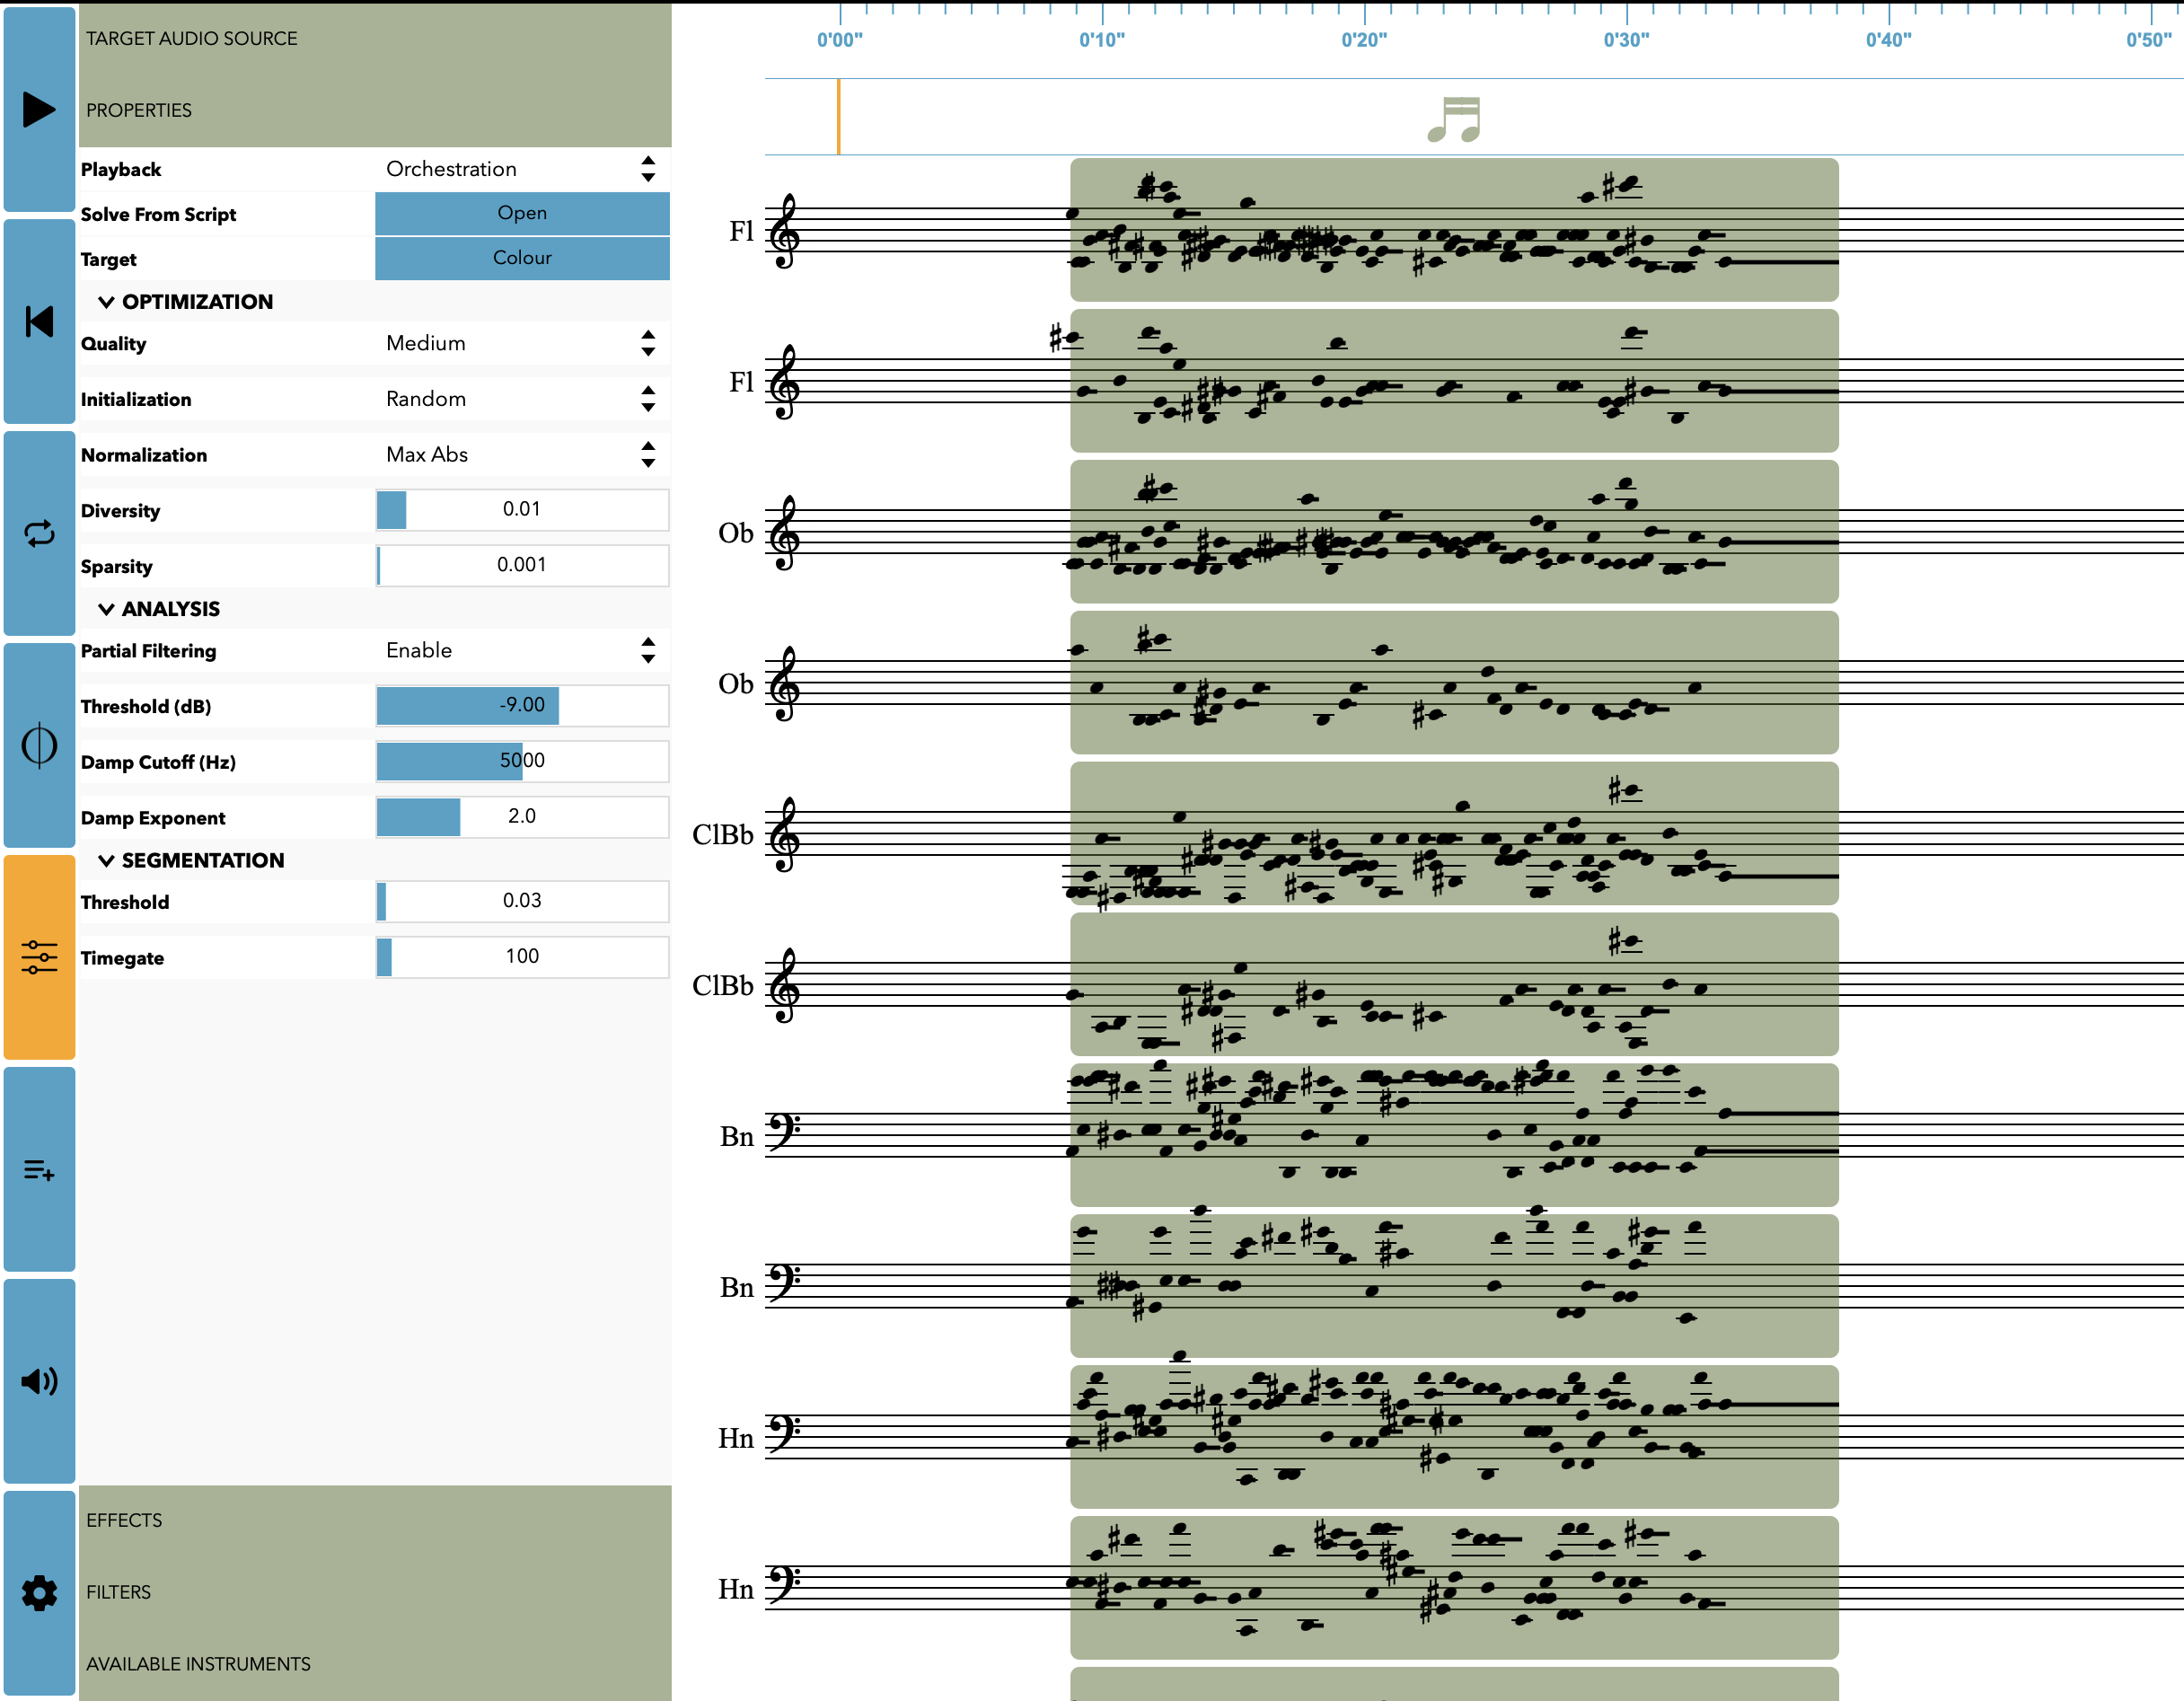
Dynamic Orchestration! With Dynamics and Playing Techniques hidden
Further Customization
Explore other options in the Inspector to further customize your orchestration.
Learn More:
- A very important aspect of working with Orchidea is: Exporting your work! Check out this tutorial to see how (coming soon)
- To learn more about the advanced options and filters available for your orchestrations, and to gain a deeper understanding of Dynamic Orchestration, refer to the upcoming detailed tutorials (coming soon).
Leave a Reply