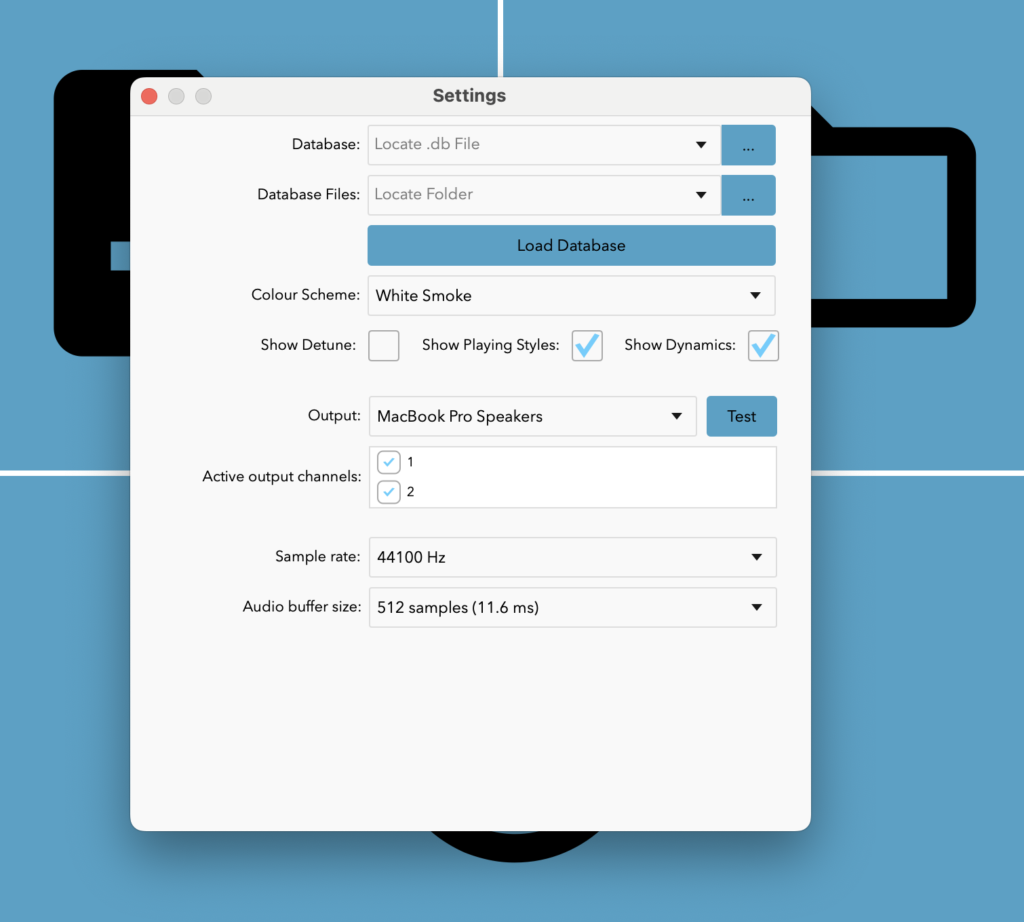
Database: Click the button with three dots (“…”) next to this field to browse and select your .db file. This file contains the database information the software needs to operate.
Database Files: Similarly, use the button with three dots (“…”) next to this field to locate the folder that contains your database files.
Load Database: Once you’ve selected the appropriate files, click this button to load the database into the software.
Appearance Settings:
Colour Scheme: Use this dropdown menu to change the appearance of the interface. The “White Smoke” option is currently selected, (which is actually blue) but you can choose from the other available themes: Tuatara for green, and Oxford Blue for a-blue-reorchestrated-as-purple.
Playback Settings:
Show Detune: Check this box if you want to display detuning information next to each note on the score.
Show Playing Styles: Check this box if you want to display playing styles next to each note on the score.
Show Dynamics: Check this box if you want to display dynamics next to each note on the score.
NOTE: The score can get quite visually messy if you choose all of these. However, you can change this setting at any time to hide or show them.
Output Settings:
Output: Select your preferred audio output device from this dropdown menu.
Test:WARNING – turn your headphones or speakers down. Click this button to test your selected output device and ensure it’s working correctly.
Active Output Channels: You can select which channels to activate by checking the boxes.
Audio Settings:
Sample Rate: Choose your desired audio sample rate from this dropdown menu. The current selection is 44100 Hz, a standard sample rate for audio.
Audio Buffer Size: Select the buffer size that works best for your system. The current selection is 512 samples (11.6 ms), balancing latency and performance.